Our Manual Knife Sharpener performance TestEdge Smoothness


Sharpness alone isn’t the only indicator of a good sharpening device: Toothy or chipped edges perform differently than smooth ones. Here we discuss why we want a smooth edge and how we test handheld sharpeners for it.
Why Edge Smoothness Matters
Edge smoothness refers to the overall consistency of the edge angle from the knife’s tip to its heel. It is assessed by the uniformity in thickness and the lack of burrs, chips, and dents on the edge after sharpening.

A smooth and even knife edge isn’t necessarily sharper, but it produces swift, clean cuts, whereas one that’s uneven tends to tear the food. A uniform edge also reduces the chance of chipping by applying pressure evenly across its length, thus improving edge retention compared to rough or toothy edges.
Especially during food preparation, you don’t want deformities on your knife edge. Metal burrs or chips that fall off and stick to your food can potentially cause digestive and other health problems.
We decided that edge smoothness should make up 20% of the overall score for Performance.
Factors That Affect Edge Smoothness
Coarser abrasives can fix major burrs and chips, thus reducing visible deformities. However, only fine sharpening materials can smooth the metal out while straightening the edge. As a result, devices that have multiple abrasive levels tend to perform better than those with fewer levels.
The design of the sharpening slots can also make or break the knife edge that goes through it. Occasionally you’ll find one with rods or discs that are too thick or placed too far apart. If you’re not paying attention or have shaky hands, you may end up with a wavy edge out of such a sharpener.
Edge smoothness also requires a sturdy working section. Sharpeners like the Smith’s which can adjust to different edge angles tend to be less stable. It’s the inevitable compromise for versatility. Since the abrasive rods can jostle slightly, they may create dents and waves on the knife edge, practically destroying it.
An inspection of the sharpener is not enough to conclude how consistent it would be. We decided to examine each knife edge after sharpening to see how the device performs.
Our Edge Smoothness Test
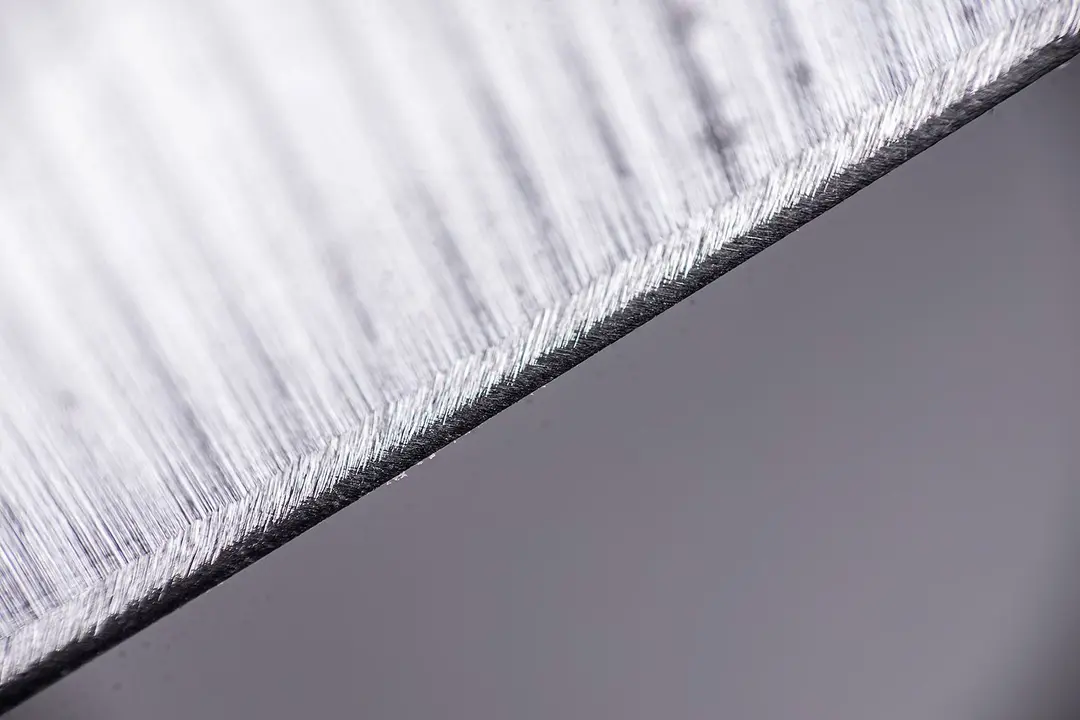
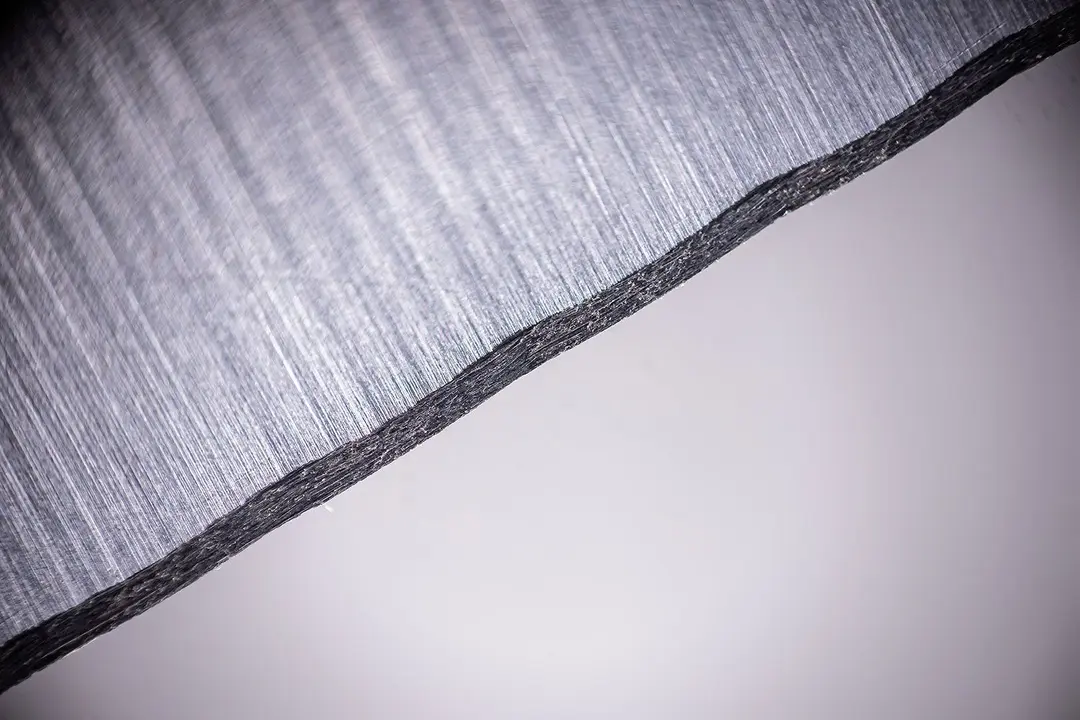
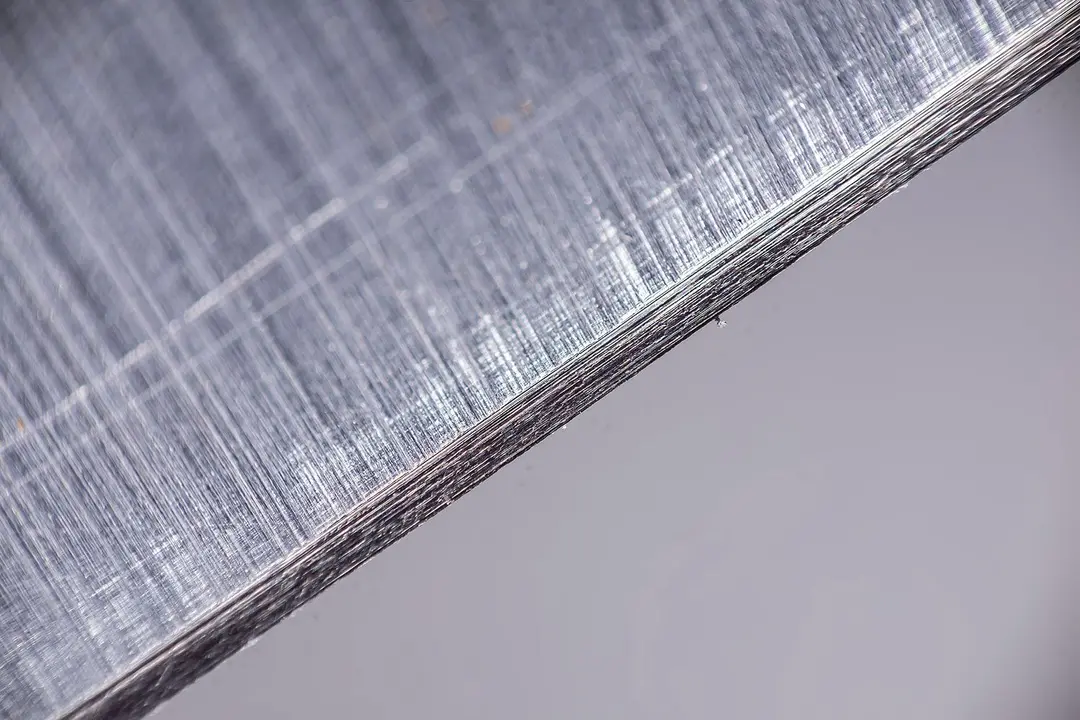
The primary edge created by a manual sharpening device is hard to see clearly. We put each knife under bright LED light to inspect the edge after sharpening. Then, we take photos of the edge using a magnifying lens and check the photos again for deformities.
‘Deformities’ refers to dents, grooves, chips, cracks, or burrs detected along the knife’s edge after sharpening.
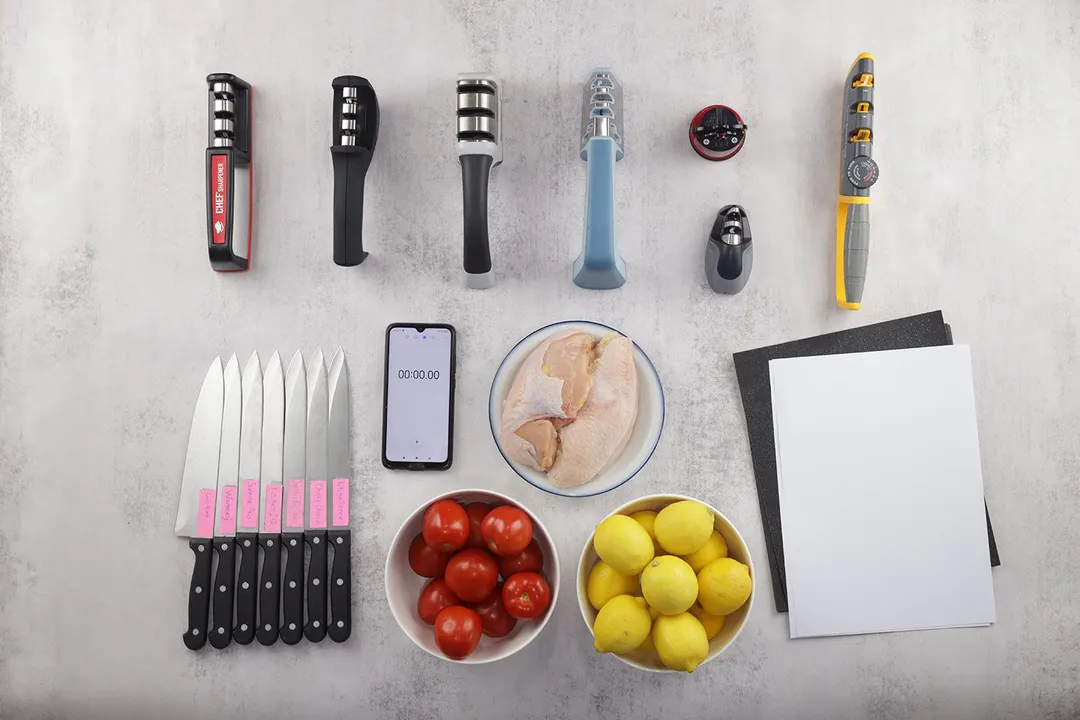
Equipment
- Sharpening device
- 8-inch chef’s knife
- Magnifying lens (x50)
- LED light
- Camera
Steps
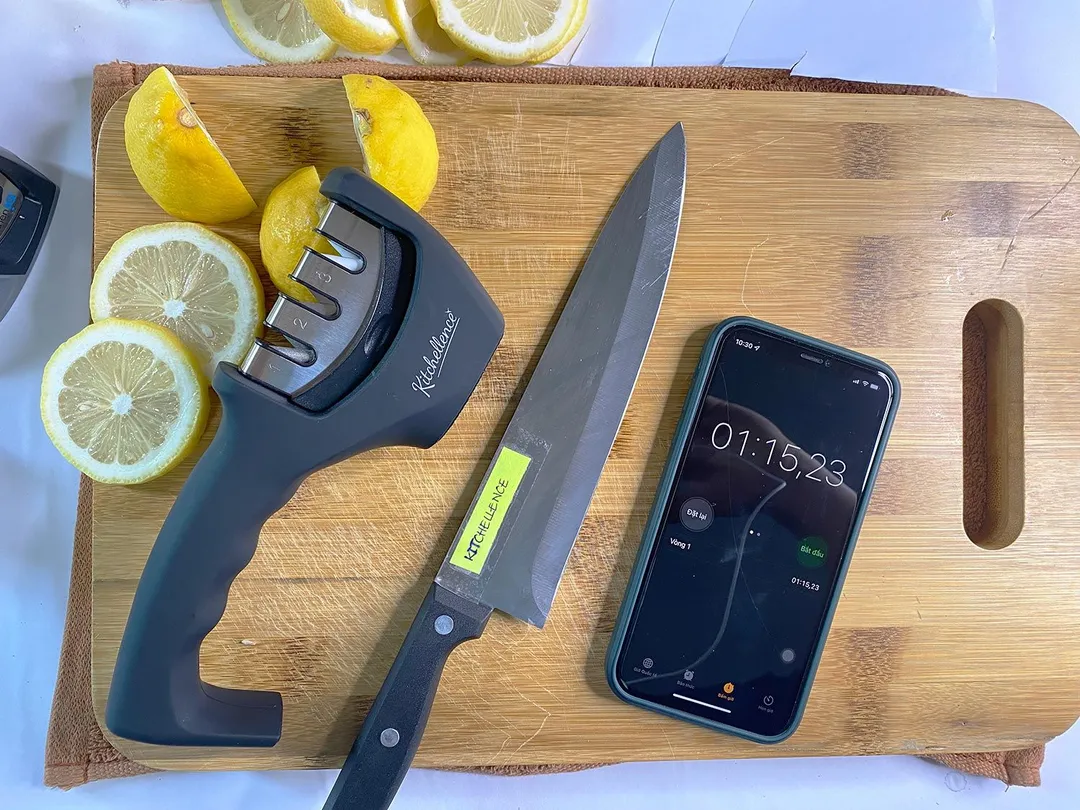
Step 1. We blunt a knife by running its edge across sandpaper for 60 seconds and test it on a piece of A4 paper to verify the bluntness.
Step 2. Next, we run the knife through the sharpener for 5 minutes, which should max out the edge’s sharpness.
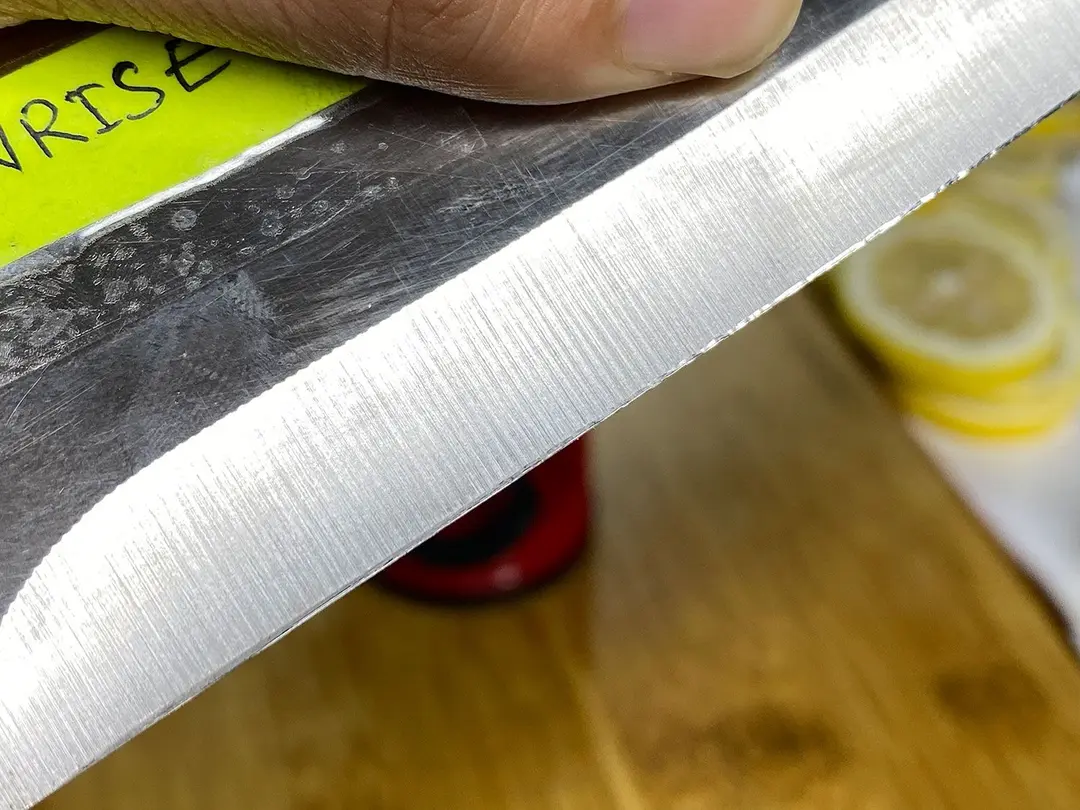
Step 3. We give the knife edge a visual inspection at a 10-inch (25-centimeter) distance and note whether we found any imperfections or deformities.
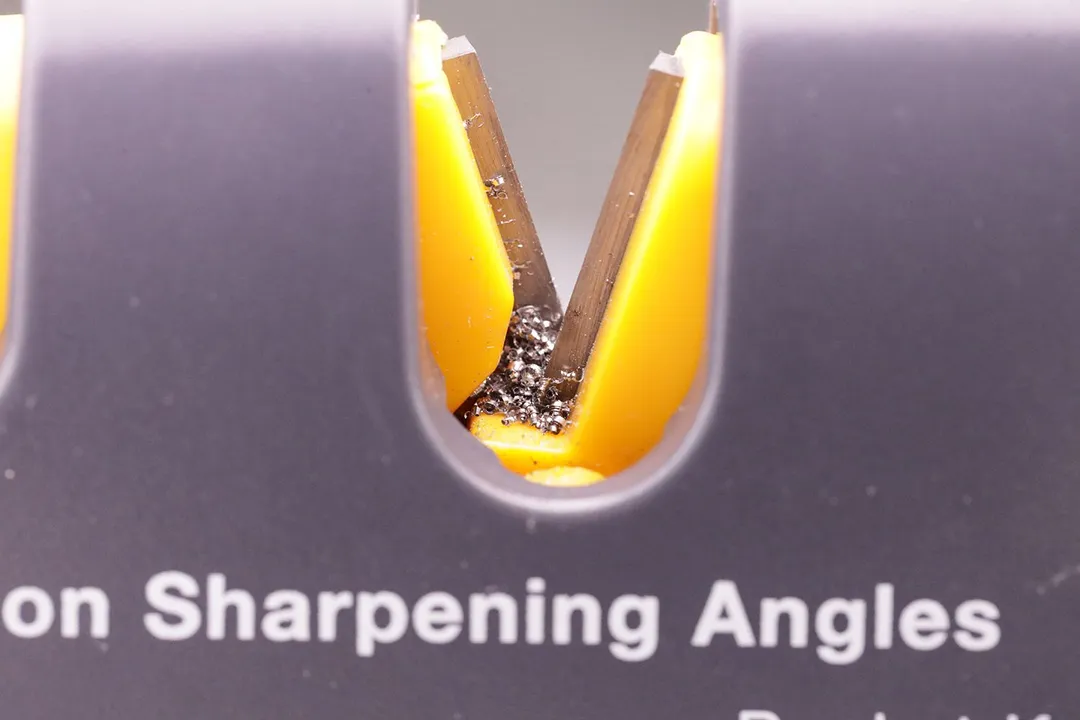
Step 4. The knife edge is then put under a magnifying glass at a distance of 2 inches (5 centimeters). Photos of the edge are taken through the magnifier.
Step 5. We use the photos to find and note the number of imperfections on the knife edge.
Scoring
We rate the smoothness of the knife edge on a scale of 0 to 10. A score of 1 indicates many deformities along the knife edge, while a score of 10 indicates a straight, smooth, near-perfect edge with minimal deformities.