Our recommendations are made independently through Research & Testing. We may receive commissions from purchases made via our links.
How to Install Water Softener
Water softeners are not particularly difficult to install. However, they do require some basic knowledge and experience in plumbing. The reason is that these systems are typically connected to the main water supply of the entire house. As such, it will require pipe cutting, pipe connection, soldering, and sometimes ground digging to allow for the placement of the pipes.
If you’re not familiar with this type of work, calling in a handyman or a professional plumber may be the right move.
What You Will Need
Installing your water softener can take as little as one hour if the installation site is easily accessible and the pipes are in good shape. But it can take up to four hours if conditions aren’t ideal.
You can save time during the installation process by preparing all the necessary tools and equipment in advance.
Here’s what you typically need to install a salt-based water softener:
- Tubing to connect the system to the main supply
- Drain tubing
- Tape measure
- Solder and torch
- Pipe cutter
- Slip joint pliers
- Teflon tape
- Pipe wrench
- Valves and fittings (sometimes included in the package with the unit)
Water Softener Installation Instructions
Here’s how to install a whole-house water softener in 10 steps.
Step 1. Shut off the water at the main line. Open the faucets to drain. Disconnect the water heater.
Step 2. Install the bypass valve into the softener.
Step 3. Place the unit at the intended position. Make sure the system will be safe in harsh weather conditions, such as flooding or freezing.
Step 4. Install 2 elbow fittings to the inlet and outlet ports of the bypass valve. Cut into the main pipe and connect the pipe to the ports. Be sure to connect the incoming water to the inlet and the outgoing water to the outlet port.
Step 5. Connect the drain tube to the drain valve fitting on the unit.
Step 6. Install the brine tube on the overflow valve on the brine tank. Follow the manufacturer’s instructions as to where to drain the brine– an air gap may sometimes be necessary.
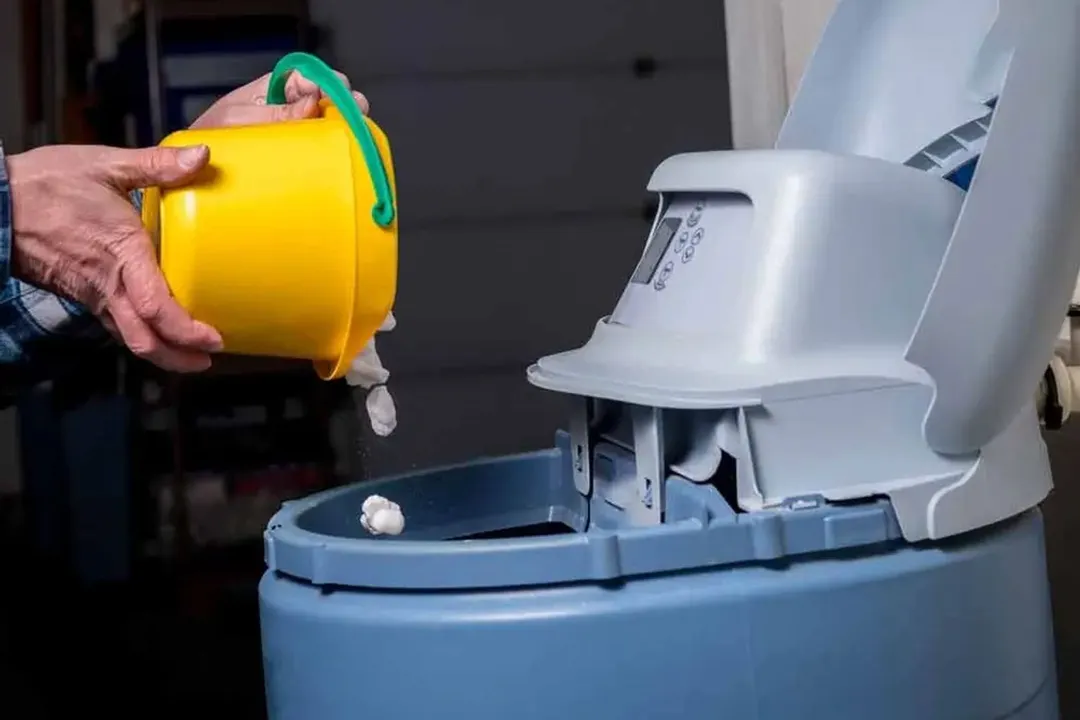
Step 7. Put the distributor tube into the brine tank and pour salt to about ⅔ the capacity of the tank.
Step 8. Set the unit to the bypass mode, then slowly turn on the water. Wait until you see a steady flow at the drain line (typically a few minutes) to open it completely. Reconnect and turn the water heater on.
Step 9. Slowly open the bypass valve and wait another couple of minutes for the air push through the system. Open the valve completely and run a backwash cycle.
Step 10. Configure the unit following the manufacturer’s instructions.
* Note that features may vary among different brands of water softeners. It’s best to follow the manufacturer’s instructions to ensure your system operates safely and efficiently.
Related post: How to Perform Water Softener Repairs at Home
About your tip

Luna Regina is an accomplished writer and author who dedicates her career to empowering home cooks and making cooking effortless for everyone. She is the founder of HealthyKitchen101.com and HealthyRecipes101.com, where she works with her team to develop easy, nutritious recipes and help aspiring cooks choose the right kitchen appliances.