Our recommendations are made independently through Research & Testing. We may receive commissions from purchases made via our links.
Why Is My Ice Maker Not Working: Troubleshooting Guide
An ice maker not working could be because of a variety of issues. This troubleshooting guide can help you find out and fix it yourself.
Having your ice maker not working can throw a wrench in your day. Even getting deformed ice cubes can be pretty frustrating.
Although it may seem as if they need a professional’s touch to begin working again, ice makers are actually uncomplicated machines. It’s entirely possible for you to troubleshoot them. The majority of ice maker problems can also be easily fixed, too.
Today’s troubleshooting guide will focus on Whirlpool ice makers. But considering how all ice makers technically have the same design, this guide may also help if you have a different brand.
Ice Maker Not Working: Potential Issues and How to Fix Them
One small caveat before we begin: the Whirlpool ice makers discussed here are not any specific models. Thus, your model may have (or lack) certain parts that are presented in this guide, like the infrared sensing module. Check the user manual of your model for further detail.
Non-optimal Temperature
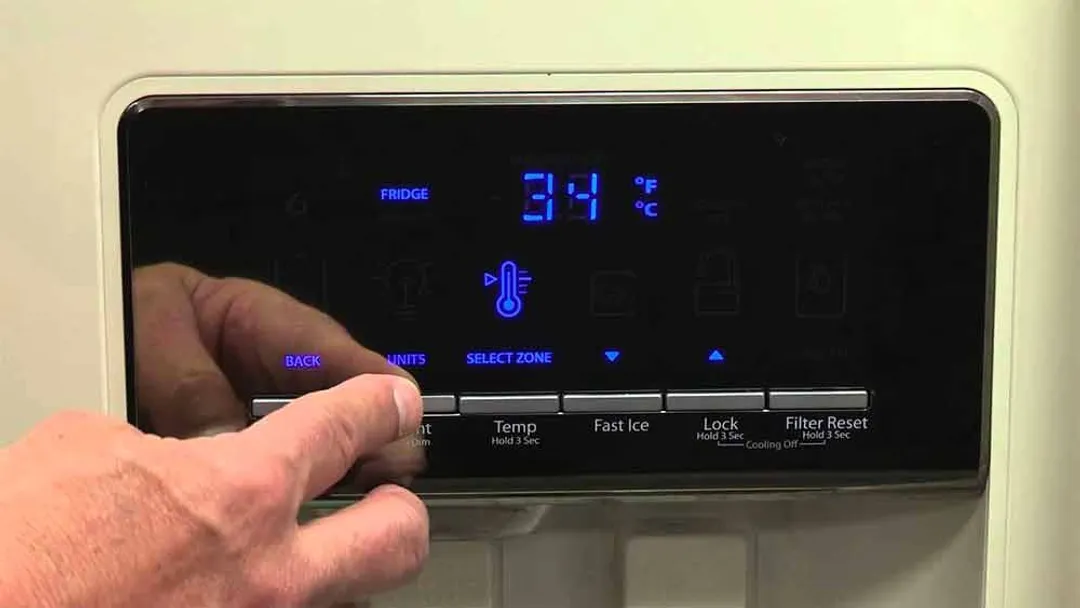
For a Whirlpool ice maker to work properly, the fridge’s temperature must be equal to or less than 10°F. It’s recommended to set the temperature between 0°F to 5°F for best results.
If you have set up the fridge’s temperature as such, but the measured temperature inside of the freezer remains too high, there may be some issues with the freezer itself.
First, see if the condenser coils and the condenser fan are both working properly. The condenser coils remove heat from the refrigerants, and if they’re dirty, the refrigerants will not be able to cool down. In turn, the fridge won’t be able to cool itself properly, causing the temperature inside to be higher than it should be.
To get it to work again, shut off the fridge by unplugging it, then clean up the coils with a vacuum, duster, or a soap water-imbued rag. Once all of the accumulated dirt has been sponged off, make sure the coils are completely dried before you plug the fridge back in again.
While you’re at it, check your condenser fan as well. The refrigerants are very hot when passing through the condenser coils. The fan helps keep them at a cool, safe level, which is beneficial for both the freezer’s performance and longevity.
The second step is to check the evaporator coils. This component absorbs all of the warm air inside the freezer, thus lowering the temperature. The evaporator coils of your fridge could have frosted over.
Fridge brands typically build defrost systems into their products to prevent this exact situation, so if your evaporators are indeed frosted over, the system has failed. Unfortunately, this isn’t a problem you can fix by yourself. Your best bet would be to call your local technician and ask them to replace the defrost system.
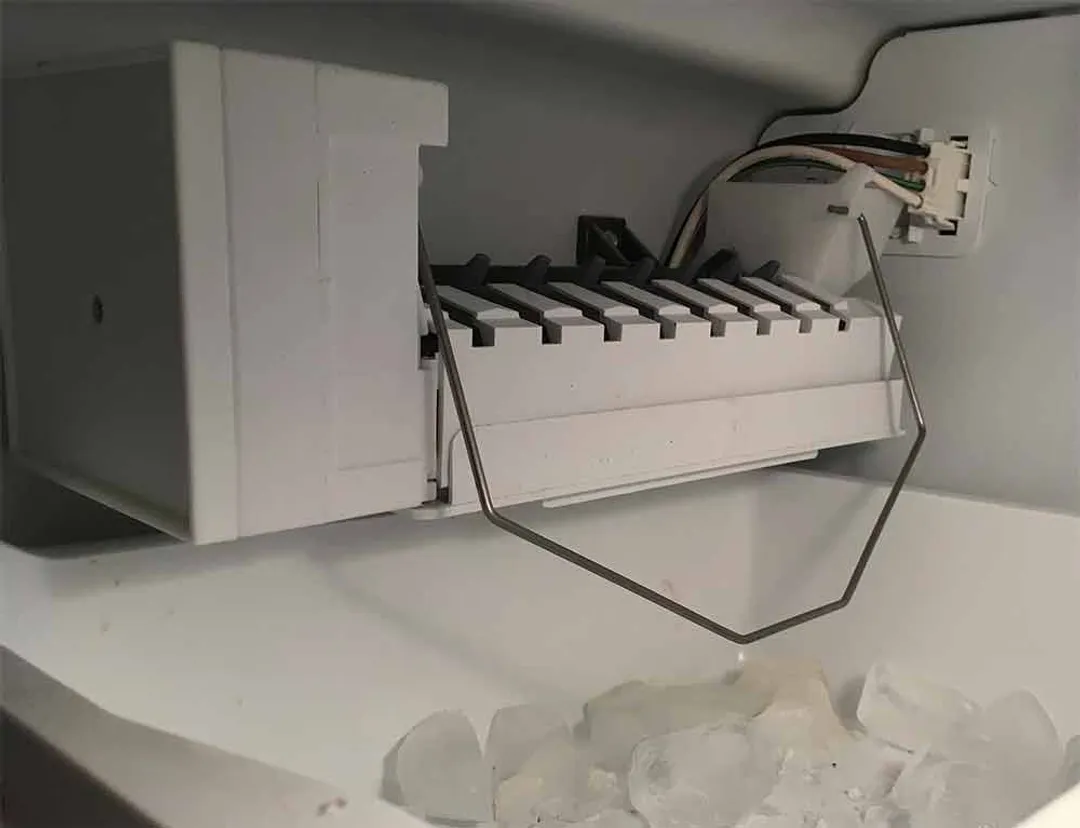
Jammed/Blocked Ejector Arm
An ejector arm is a small but crucial plastic part inside your Whirlpool ice maker. When not in use, the arm blocks the small pathway between the maker and the ice bucket. When you press the dispense button, the arm will swing open and allow cubes to fall freely into the bucket below.
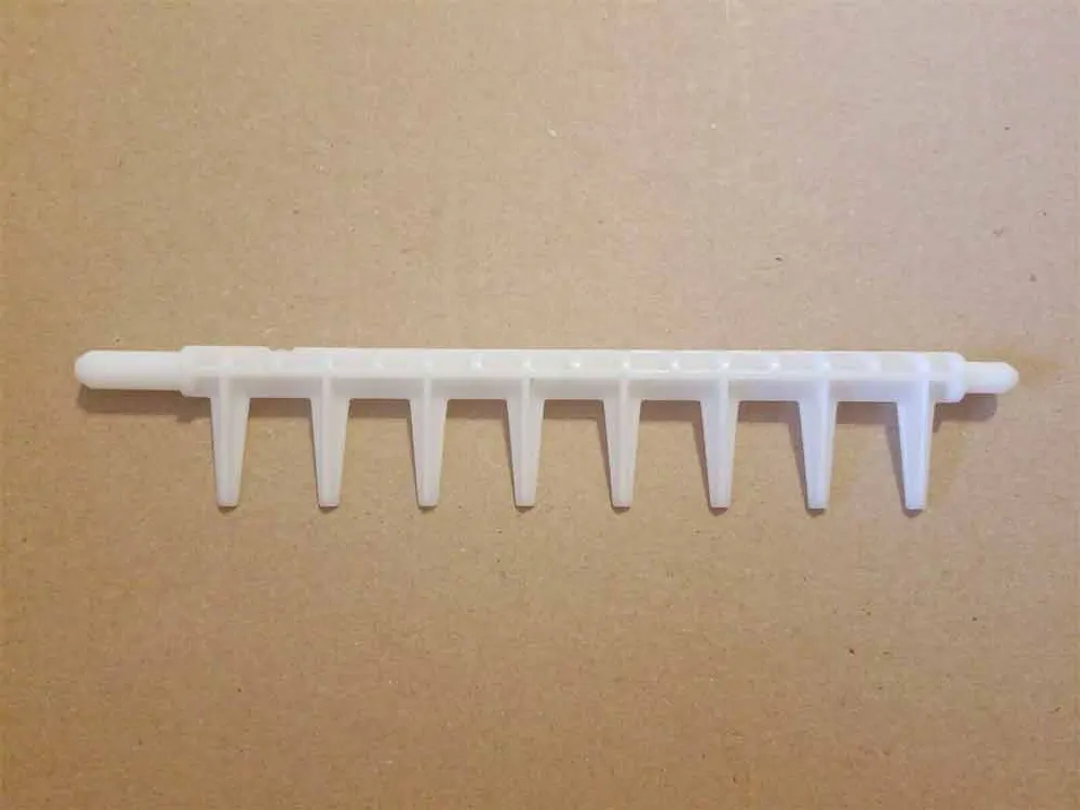
But it’s not a fail-proof process. During the back-and-forth swinging motion, the arm may close too quickly and snag a cube, creating a clog.
When this happens, it’s recommended you use a plastic utensil (like a plastic fork or spork) to pry the ice cube free. Make sure to scrape and pry the clogged cube gently to avoid damaging the plastic ejector arm.
If the arm is inadvertently damaged, Whirlpool does have replacement parts available. It’s very expensive, however, so it’s best to exercise caution.
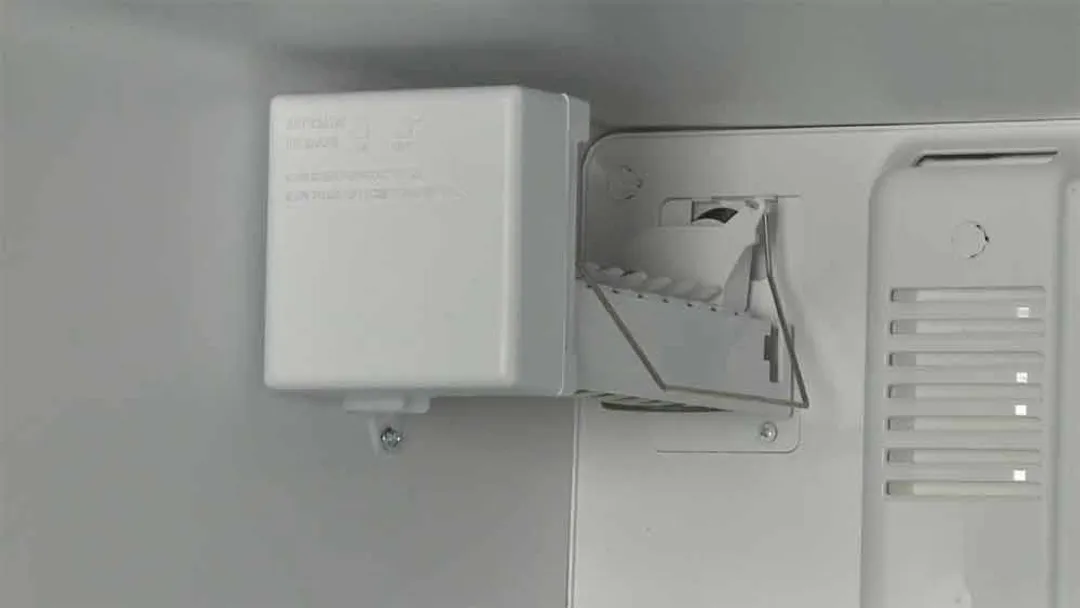
Jammed Feeler Arm
A feeler arm is a spring-loaded part that prevents overflow inside the bucket. When ice cubes fill the ice bucket up high enough to make contact with the arm, the ice maker is automatically disabled.
It’s entirely possible for the feeler arm to become stuck due to being frozen or lack of lubrication. Give the feeler arm a tug to see if it’s stuck. If the arm comes down and is followed by the rushing sound of water flowing into the ice maker, then it was indeed stuck.
Check the feeler arm in more detail afterward. See if it’s merely iced up or needs further lubrication.
Ice Maker Is Turned off
To begin with, make sure the ice maker is on. It’s not uncommon for people to trip the power arm accidentally while rummaging through the freezer.
If the arm is in the raised position (OFF), lower it back down and it should power on your ice maker. You should hear an audible click when the arm is set down to the correct position.
Whirlpool has created a video specifically for this problem. You can check it out here:
If your ice maker is on, but there still isn’t any power, use a multimeter for a continuity test. If not, you may have to replace the whole lever. If that still doesn’t work, there may be a bigger problem with the ice maker itself and will require a professional technician to come over and check.
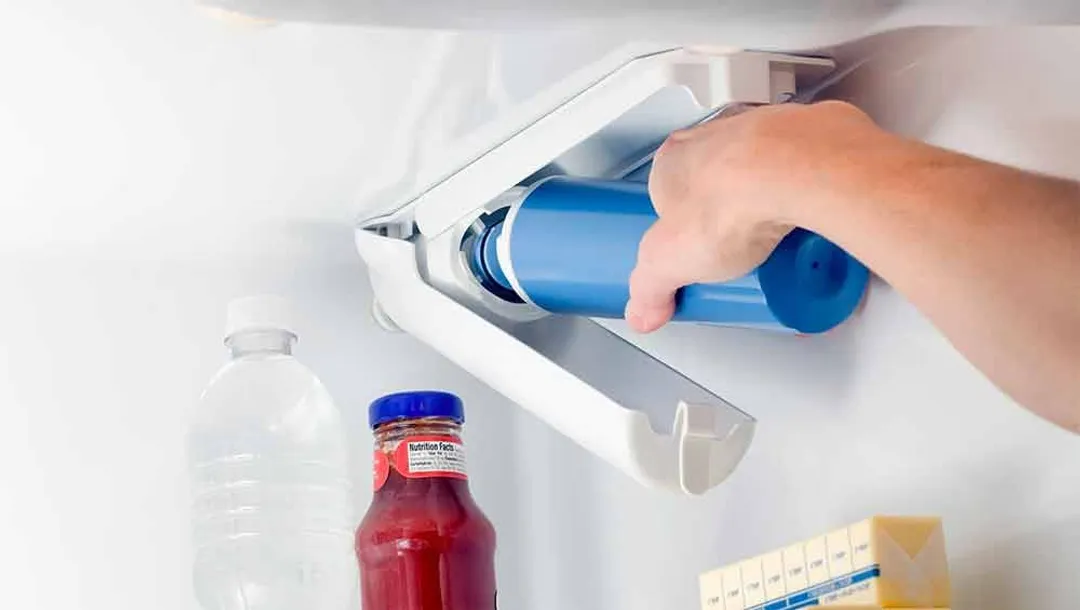
Water Filter Needs Replacement
There are three symptoms that may indicate a failed water filter:
- The ice maker produces little to no ice.
- Cubes come out of the maker misshapen or thinner than usual.
- The cubes have a strange taste or smell to them.
The latter could potentially be dangerous. Ice cubes tasting or smelling strange is a very strong sign the water is not filtered.
For most households in the U.S., drinking water straight from the pipes without further filtering should be okay. It would only taste a little strange due to minerals and chlorine.
However, while tap water is perfectly safe for consumption, old water pipes could leak lead, arsenic, nitrates, as well as some germs. These could prove dangerous for children and those with compromised immune systems. As a result, we recommend getting your ice maker’s filter replaced as soon as possible in this instance.
If you need ice immediately, you can just remove the filter altogether. This will put the ice maker into what’s called “bypass mode.” Your Whirlpool ice maker will continue to work and produce ice as normal, foregoing the filter and using straight pipe water for the process.
According to the service manuals from Whirlpool, the filter has to be replaced once every 6 months for optimum performance. Make sure to install it correctly, too. An improperly installed filter can also prevent water from flowing into the maker, giving you badly formed cubes, or even no ice at all.
Water System Has to Be Flushed
An unflushed water system can accumulate a lot of air. This will cause the resulting ice cubes to be hollow or smaller than usual. Having air inside of the water line will also cause the dispenser to drip.
For this reason, Whirlpool recommends you flush the water system once every 6 months. When you replace the filter, take the opportunity to flush the water system as well.
To purge air from the dispenser, use a large cup or container to depress the water dispenser lever for 5 seconds. After the elapsed time, release the lever and wait another 5 seconds. Continue this cycle until the water flow is smooth and steady, which indicates a purged water line.
As expected, you’ll dispense a lot of water during this process, so take the 5 seconds’ rest between the purging cycles to empty your cup. You may vent as much as 3 gallons of water until the water line is air-free.
Check the Water Supply Line
Check to see if the fridge’s water line is properly connected to your home’s water supply. While you’re at it, make sure the water shutoff valve isn’t closed.
Take a look at the shape of the water supply line itself, also. If you find a sharp bend or a kink on the line, that could be why your ice maker is misbehaving. A pinched water line restricts the flow of water, causing less to reach the ice maker and limiting its performance.
If you find leaks, shut down the ice maker, close the water shutoff valve, and replace the whole line.
Advanced Troubleshooting Steps: Why Is My Ice Machine Not Making Ice, Still?
All the aforementioned methods are quite simple and can be done by most people. But if none of them work for you and you have some technical know-hows and the right equipment (i.e., a multimeter), you can try the below steps.
But when it reaches this point, we recommend you just call a professional technician to check the ice maker. Unless you’re very sure you can do it yourself, doing these steps incorrectly could potentially ruin your ice maker.
Check the Water Inlet Valve
Water flowing through the supply line has to go through the water inlet valve to enter the ice maker. So, if there’s any issue with the water inlet valve, your ice maker will not receive any water, even if the water supply line is good.
First, do a continuity test using a multimeter to see if the valve is receiving any power.
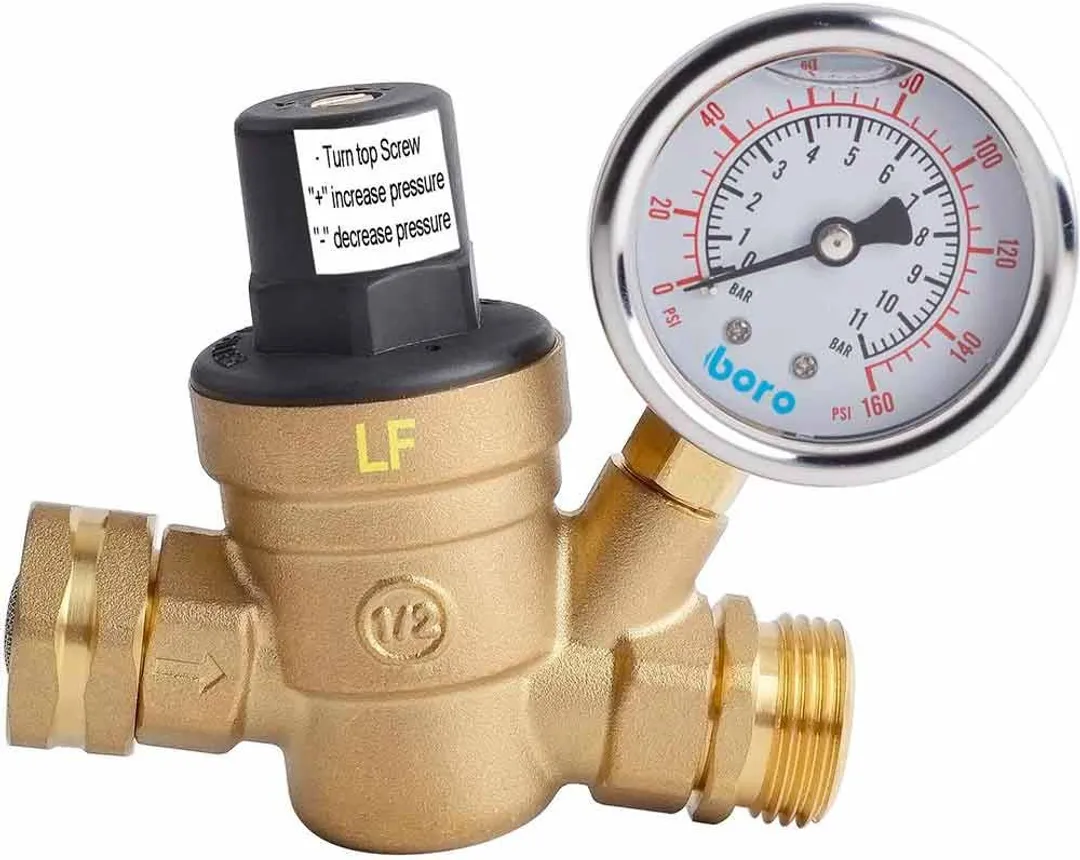
In addition, the valve is primed to work only when pressure is around 20 PSI. If your home’s water pressure is lower, it will have problems letting in water.
If your house does have too low water pressure, try to locate the main supply pipe and its assortment of valves. Use the pressure-reducing valve (it’s shaped like a cone) to increase pressure to the correct limit. Otherwise, you may need to use a pressure booster or give your local water department a call.
Infrared Optics Sensor Fault
Many Whirlpool ice makers include an infrared sensor to detect the amount of ice available in the ice bucket. It is the modern variant of the feeler arm in older ice makers.
The sensor sends out a continuous signal across the top of the bucket. When ice reaches the top and disrupts the signal, the ice maker automatically stops. When the ice level drops below the sensor, the ice making process resumes.
The control board for the infrared sensor could fail, stopping the ice maker from working altogether. Use a multimeter to perform a continuity test on the board. If there’s no power to it, replace the board.
Mold Thermostat Fault
The ice tray has a built-in thermostat to monitor the internal temperature. When the temperature is right, the ice maker releases water into the tray to form ice cubes. If the thermostat fails, the ice maker will stop.
Once again, use a multimeter to check the mold thermostat for continuity. If the thermostat fails the test, replace it entirely.
But, if the thermostat has power, chances are high the internal temperature inside the freezer hasn’t passed the minimum threshold yet (around 20°F).
Door Switch Fault
A door switch prevents the ice maker and the water dispenser from working when the door of the fridge is open. Expectedly, if the door switch doesn’t work, neither will the ice maker nor the water dispenser.
Perform a continuity test on the door switch. If it fails, replace it.
Whirlpool Ice Maker Not Working
How to Reset Control Panel of Whirlpool Ice Maker
For more modern refrigerators with full-fledged control panels, it’s a good idea to try resetting the control panel. Not only does it not require any significant disassembly, it may fix some issues relating to the control panel, too (improperly displayed graphics, screen artifacts, unaccepted inputs, input lags, etc.).
Find your ice maker’s door switches (there should be two of them). If you don’t know where they are, use the user manual. Press both of them simultaneously along with the fridge’s temperature button three times in the span of 10 seconds.
When you release the buttons, the freezer’s panel should display “s” and the fridge’s display should show “e.” This means the board is in reset mode.
Press the temperature button once, and a string of numbers should flash across the screen with a “1” displayed on the freezer’s monitor. Once the numbers on the fridge disappear (the “1” on the freezer should remain), the control board has reset.
Wait a while and all of the screens should return to normal. Check all the functions to see if they’re working properly and whether or not your problems have been fixed.
How to Reset Whirlpool Ice Maker?
Before you try all of the aforementioned steps, it would be a good idea to reset your Whirlpool ice maker to see if it resolves any of the problems. There are two ways you can reset a Whirlpool ice maker: the reset button, or the ON/OFF switch.
In most Whirlpool ice makers, you’ll find the reset button by removing the ice tray. It should be somewhere at the bottom of the ice maker. Press the button and hold for about 10 seconds. You will then hear a small chime or, in some models, the fridge will shut down for a bit, make a small noise, and begin working again.
Once that’s done, replace the tray and shut the door. The ice maker will take a while to reset fully, and when it does, it will automatically dump everything in its reservoir. If you don’t replace everything and close the door, it’ll spill water onto your floor.
While most Whirlpool ice makers come with a reset switch, there are some exceptions. In that case, just use the classic “turn it off and on again” tactic.
If your model is equipped with a power arm, flip it up to turn off the ice maker. After that, unplug the entire refrigerator and wait for about 5 to 10 minutes. Plug everything back in and see if your problems have resolved themselves.
Some older models may not have a power arm. If that’s the case for you, the power button is usually located behind the front cover plate and the ice tray. Remove both parts to locate it. Press it to turn off the ice maker, unplug the fridge, wait 5-10 minutes, then plug and place everything back, and check to see if your issues persist.
KitchenAid Ice Maker Not Working
KitchenAid is also a popular ice maker brand. It’s fortunate that the majority of ice makers on the market typically share the same design. Thus, many of the troubleshooting steps above also apply to KitchenAid models.
As far as our research goes, there aren’t many differences between the issues for KitchenAid ice makers and those of Whirlpool models. As a matter of fact, the ways to solve these issues are more or less identical for both brands.
Kenmore Ice Maker Not Working: How to Reset
Most Kenmore ice makers do not come with a reset button. Instead, resetting them simply means turning them off and on again after a while.
First, remove the front cover of the ice maker. The plate should come loose with a simple tug.
Next, find the circuit board of the ice maker. There should be a power switch there. Press the switch to shut down the unit, then shut down the refrigerator altogether.
Wait for five minutes before plugging in the refrigerator again. Press the ice maker’s power button to turn it back on.
Replace the cover plate and close your freezer. The ice maker will then go into reset mode. It will take a few hours before ice production resumes at a nominal rate.
Samsung Ice Maker Not Working: How to Reset
Most of the issues previously mentioned and solutions are also applicable to Samsung ice makers. However, there is one thing that you have to take note of. Instead of having a RESET button, a Samsung ice maker has a TEST button.
The name is just different. In reality, the test button has the same functionality as the reset button in ice makers from other brands.
So, if you ever want to reset your Samsung ice maker, remove the ice tray and find a rectangular button labelled as “TEST” at the back. Press and hold the button until you hear a chime (takes around 10 seconds).
If you do not hear a chime, power down the ice maker and shut off the circuit breaker. Wait around 5 minutes before powering it back on. Try the button again to see if there is a chime. If there isn’t, you will have to call Samsung technicians to come over and check out the ice maker.
If you hear a chime, release the test button.
In the span of 6 minutes, you will hear noises from the ice maker. You will hear a few ice cubes dropping, as well as the sound of water rushing through the system. This is completely normal.
Once the test has completed and the system reset, the ice maker will let out another chime, signalling success.
It may take as much as 24 hours for the ice production rate to return to the nominal rate.
LG Ice Maker Not Working: How to Reset
There are two types of LG ice makers.
The first type has a full on power switch right on the unit. Just open the freezer and you can access the switch immediately. This is the easiest type to reset. Just turn the unit off, unplug the refrigerator, wait for 30 seconds, before turning everything back on again.
Then there is the second type. Instead of having a power button, this one has a “test hole”. In order to reset the unit, you have to plug a special pin into the test hole. After 3 seconds, the ice maker’s arm will turn, signalling the start of a test cycle.
GE Ice Maker Not Working: How to Reset
To reset a GE ice maker, you also need to do the turn-on-and-off cycle that you did with other ice makers. The power button is usually located at the front of the unit.
Press the button to turn the ice maker off and let it be. After 30 seconds, turn it back on again.
Then, quickly locate the feeler arm of the unit and push up 3 times.
The ice maker will go into reset mode.
Conclusion
Having your Whirlpool ice maker not working isn’t fun and can be deeply frustrating. So, we hope this troubleshooting guide has helped you figure out why your ice maker isn’t doing its job, and how to fix it.
Authors

Luna Regina is an accomplished writer and author who dedicates her career to empowering home cooks and making cooking effortless for everyone. She is the founder of HealthyKitchen101.com and HealthyRecipes101.com, where she works with her team to develop easy, nutritious recipes and help aspiring cooks choose the right kitchen appliances.