Our recommendations are made independently through Research & Testing. We may receive commissions from purchases made via our links.
How to Perform Water Softener Repairs at Home: DIY Fix-Up Guide 2023
Has your water softening system run into trouble? Here’s how you can perform water softener repairs at home.
More than 85% of households across the country are plagued by hard water. Not only is it irritating to your skin, but hard water can also clog up and damage appliances and water pipelines over time.
It’s not surprising, then, that water softening systems are such indispensable additions to many homes.
But just like any other kind of equipment, a water softener can fail. What most people don’t know is that with a little technical know-how, you can actually perform most water softener repairs yourself.
Here are the steps you should take to troubleshoot and repair your home’s water softening system.
Before You Perform Water Softener Repairs: Disclaimer
Though most of the procedures should be fairly straightforward, there are a few things you should seriously consider before attempting repairs.
A water softener is a complicated machine consisting of many components. If you’re not used to working with machinery, power tools, or electric components, it’s best that you leave it to professionals. While the repair bill for a water softener may cost a pretty penny, a new one will cost you even more. And that’s without even considering the risk of injuries.
Additionally, most brands will void your warranty if you attempt to fix it yourself. So, you should see if your unit is still covered by warranty and if you can get the company to fix it for you or else.
Only if your unit is out of warranty or you’re very certain that you can handle the job should you proceed further.
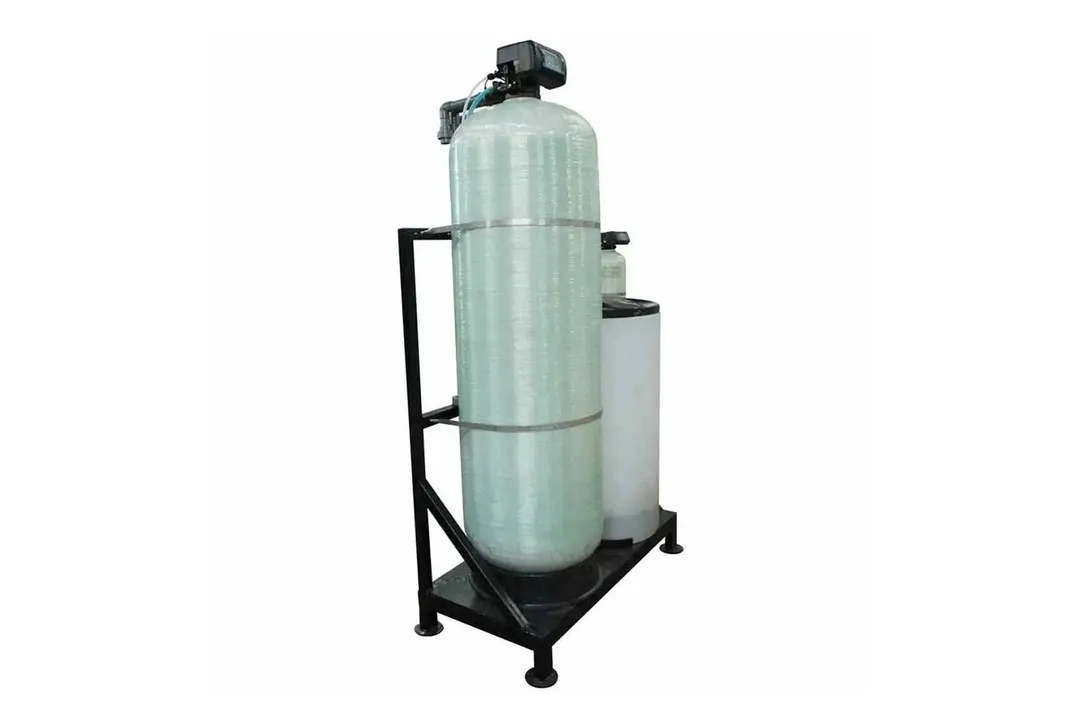
How to Diagnose a Water Softening System
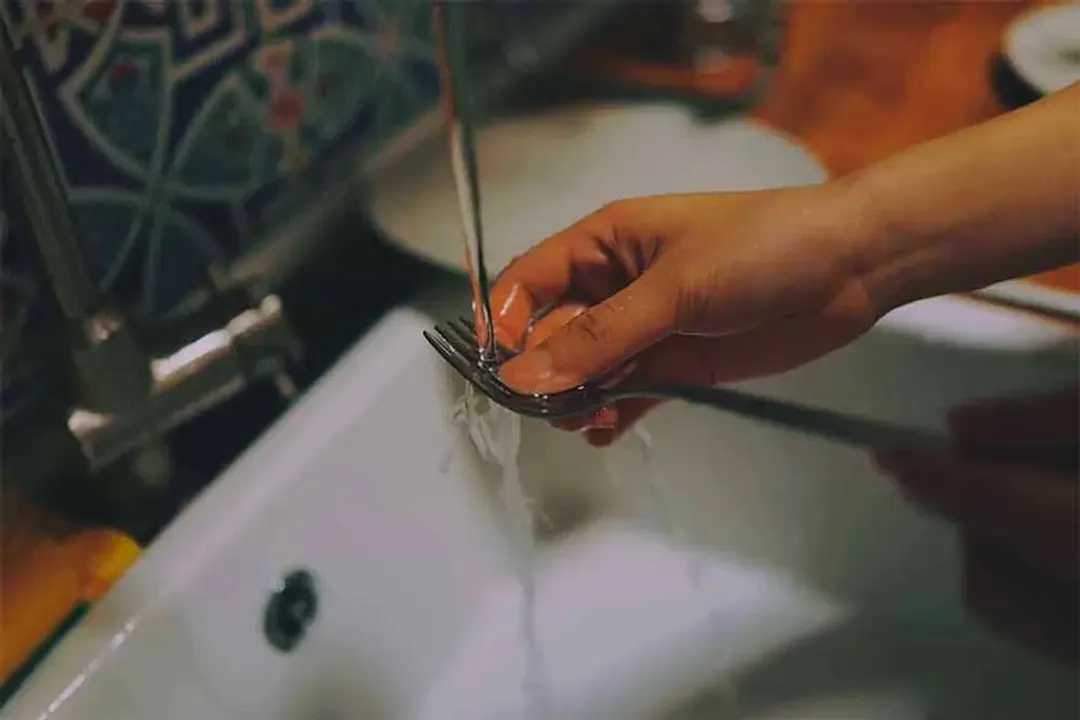
The first step to fixing any issue is to know the cause. So, start by inspecting the water softener carefully to see why it stopped working properly.
Below is a list of four components to inspect and the common problems associated with each. The list is not all-inclusive, of course, but it does cover the majority of the fixable issues. If the problem you’re facing is not on this list, you may need to either ask a professional or replace the system altogether.
Check the Power Status
Make sure that the system is up and running first. See if it has been properly plugged in, powered on, and all of the necessary valves opened.
Inspect the Water Softener’s Bypass Valve
A bypass valve gives you the ability to direct water around the water softening system. In other words, when the valve is in use, the water “passes by” the softener, essentially taking the unit offline. You will still get water out of your taps and faucets. However, that water is unprocessed and is coming straight from the primary water pipes.
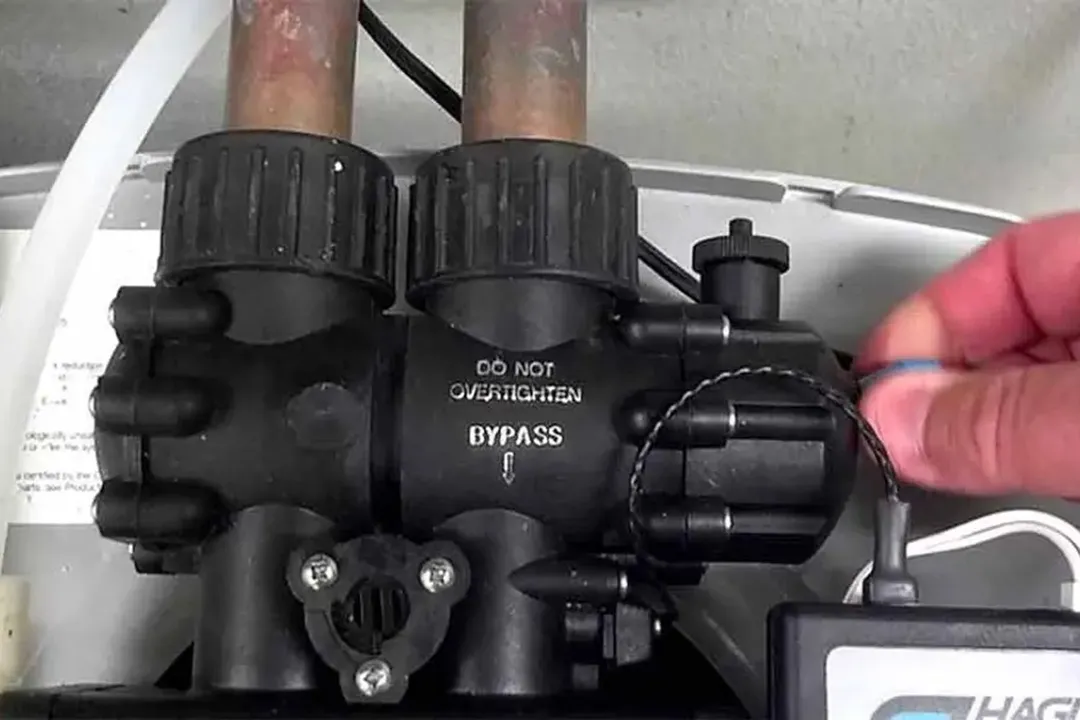
Some models do not have a bypass valve. Nonetheless, they still have components that can essentially accomplish the same thing. Depending on the design and the model, it can either be a globe valve or a regular plumbing line.
Typically, these bypass components are situated on top of the water softener’s media tank. Check if they are clogged or otherwise faulty.
It’s fairly common for a water softener to lapse into “Bypass Mode,” so this should be a priority inspection step whenever your water softener fails.
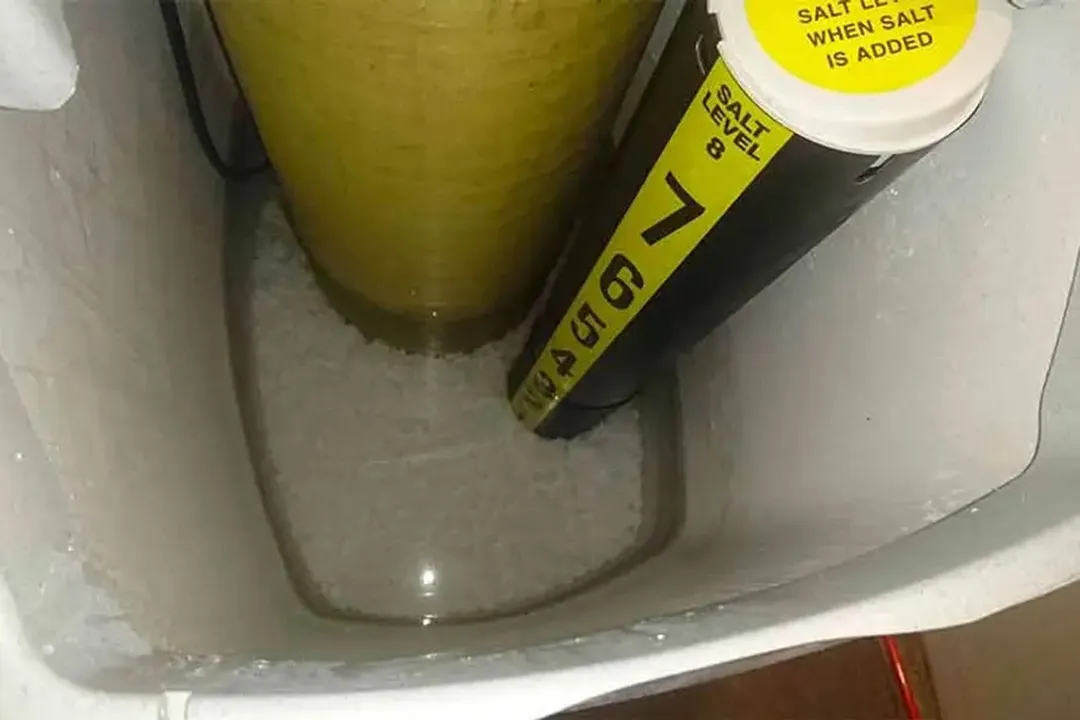
Inspect the Brine Tank
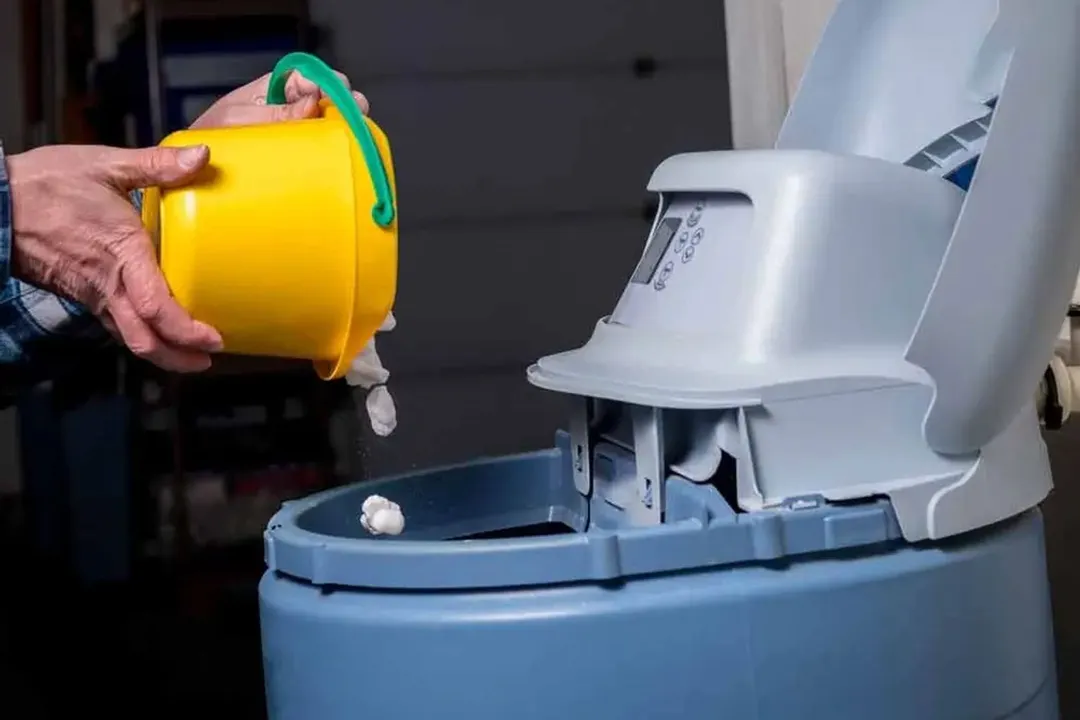
The brine tank is one of the most important components in your water softener. For it to work properly, there must be a decent level of salt inside the tank. You also need the correct type of salt.
Ideally, the salt level should be 2 to 3 inches above the water level. The salt in your water softener needs to be either evaporated salt or potassium chloride.
Both of these issues can be fixed easily.
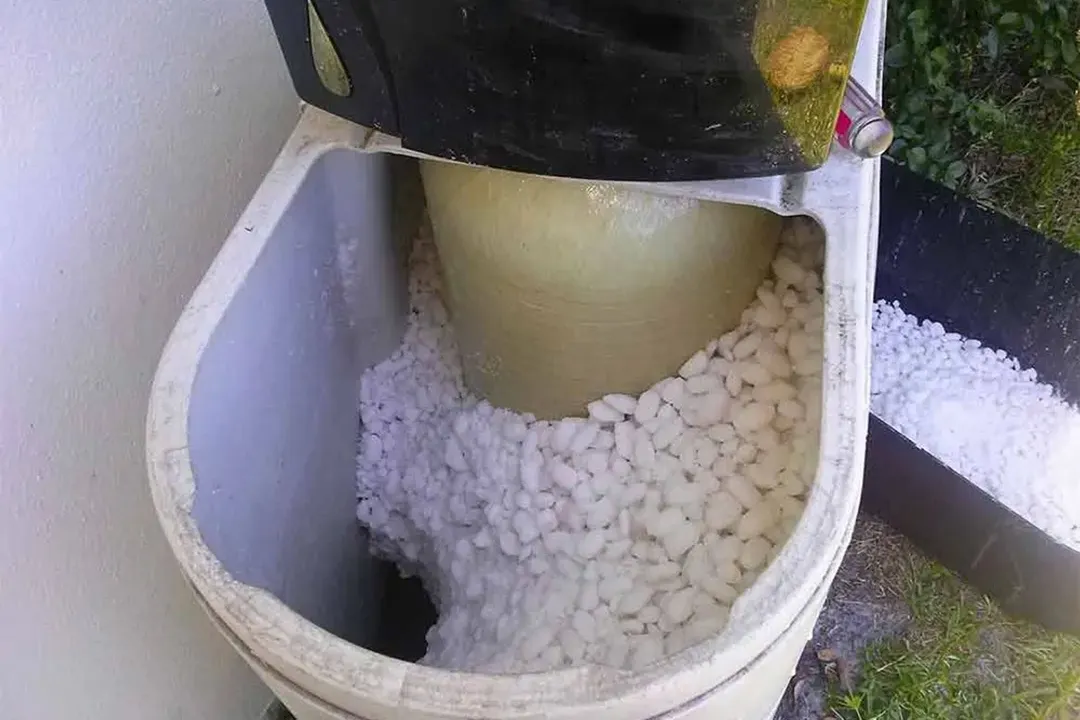
Inspect the Water Softener’s Resin Bed
The resin bed — similar to the salt tank — is an important part of the water softening system.
Here, you will find thousands of tiny resin beads that are capable of facilitating a process called “ion exchange” which draws out magnesium and calcium ions, thus softening the water.
Eventually the resin will get saturated. To make it functional again, the resin bed is “regenerated” by being washed with the salty brine from the brine tank. This process covers the resin beads either in sodium or potassium ions, depending on the type of salt you use.
These two ions are used in the system because they are considered “soft ions.” When they’re in the water, they won’t cause all of the annoying effects of “hard” ions like magnesium or calcium.
When hard water flows through the resin beads, it kickstarts the exchange process.
Magnesium, calcium, and other hard ions are drawn out of the water and attach to the beads. In return, the beads release the soft sodium or potassium ions into the water, softening it.
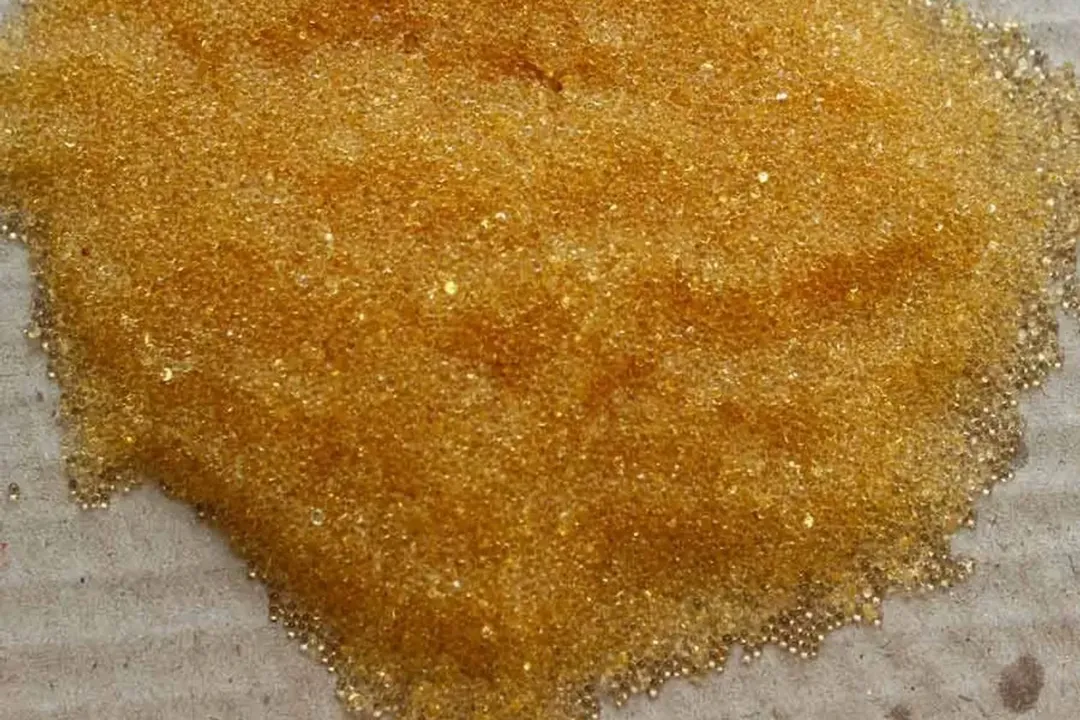
All of the hard ions captured by the resin beads will later be flushed out of the system and down the drain when the water softener regenerates. This effectively “cleans” the resin bed and allows it to continue trapping hard ions in later cycles.
If the resin bed has a problem, your water softener will either shut itself down or become ineffective. Make sure to inspect it carefully.
Inspect the Regeneration Cycle
After checking the salt tank and the resin bed, see if the water softener is performing its regeneration process properly.
Most systems are set to regenerate at night when you’re less likely to need water. If the system is set up incorrectly, the water softener may attempt to regenerate during the day.
Since most water softeners automatically go into bypass mode during regeneration, this may explain certain issues.
Common Issues and How to Fix Them
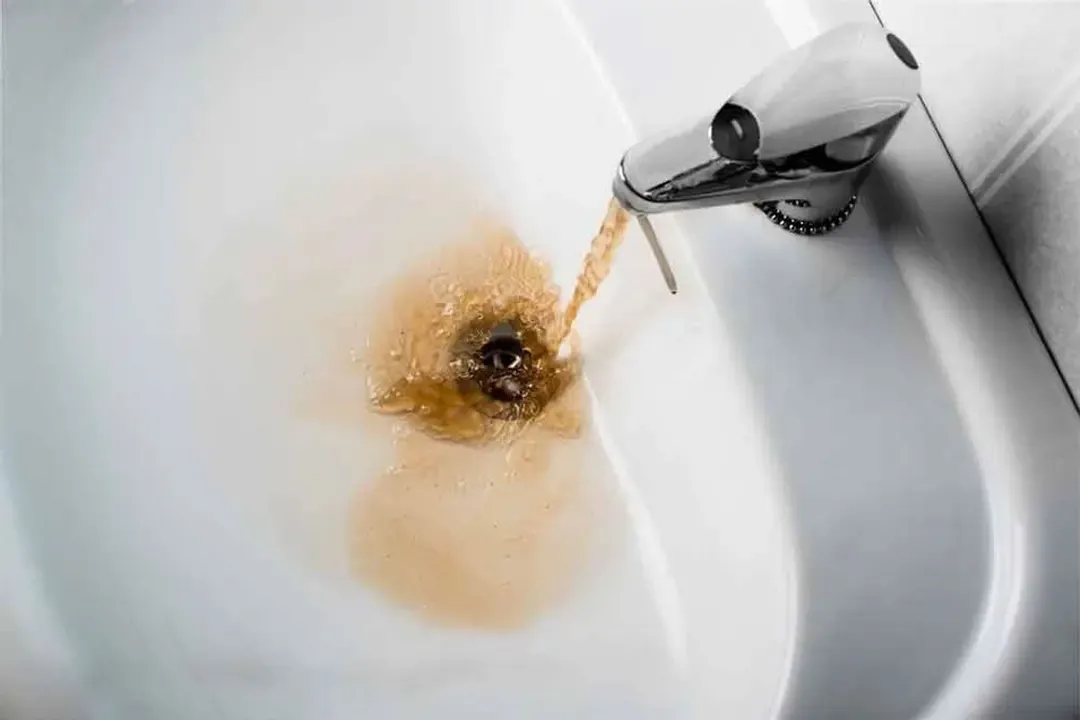
Hard Water Coming Out of the Taps
There are many potential explanations for untreated or improperly treated water flowing out of your taps.
Bypass Mode ON
The first thing to do, like we mentioned earlier, is to see if your water softener is in Bypass Mode. If it is, you can just turn off the bypass valve (or similar implements) and return it to normal operation.
Low Salt Level or Clogged Brine Tank
Next, check the brine tank for faults.
If there’s no salt or an inadequate amount of salt in the tank, replenish it. Check your manual to see which type of salt the manufacturer recommends. Typically, it is either evaporated salt (the purest grade of sodium chloride) or potassium chloride (KCl).
The brine tank may also be clogged. If so, unclog the tank.
While you’re at it, also inspect the salt inside the tank. One common explanation for a brine tank clogging is that the wrong grade of salt was used. For example, rock salt, while cheaper than evaporated salt, contains impurities and thus doesn’t dissolve well in water. Its large grains can clog up the tank as a result.
Faulty Valves
If you find the valves inside of your water softener to be faulty, they’ll need to be replaced. Make sure that the water softener is powered down and offline before you remove the valve.
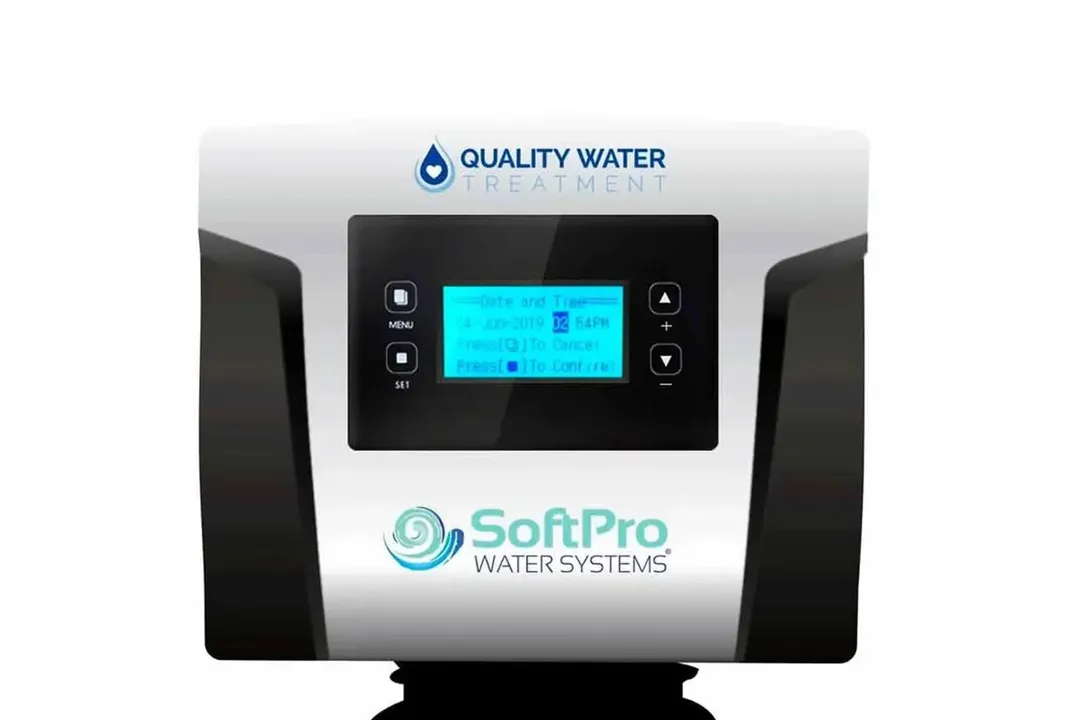
Incorrectly Programmed or Faulty Timer/Control Head
There are two types of water softening control systems on the market: timer-controlled or meter-controlled.
A timer-controlled water softener relies on a timer to know when it should run a regeneration cycle. For this type, you can dictate exactly when the regeneration process starts by setting the timer.
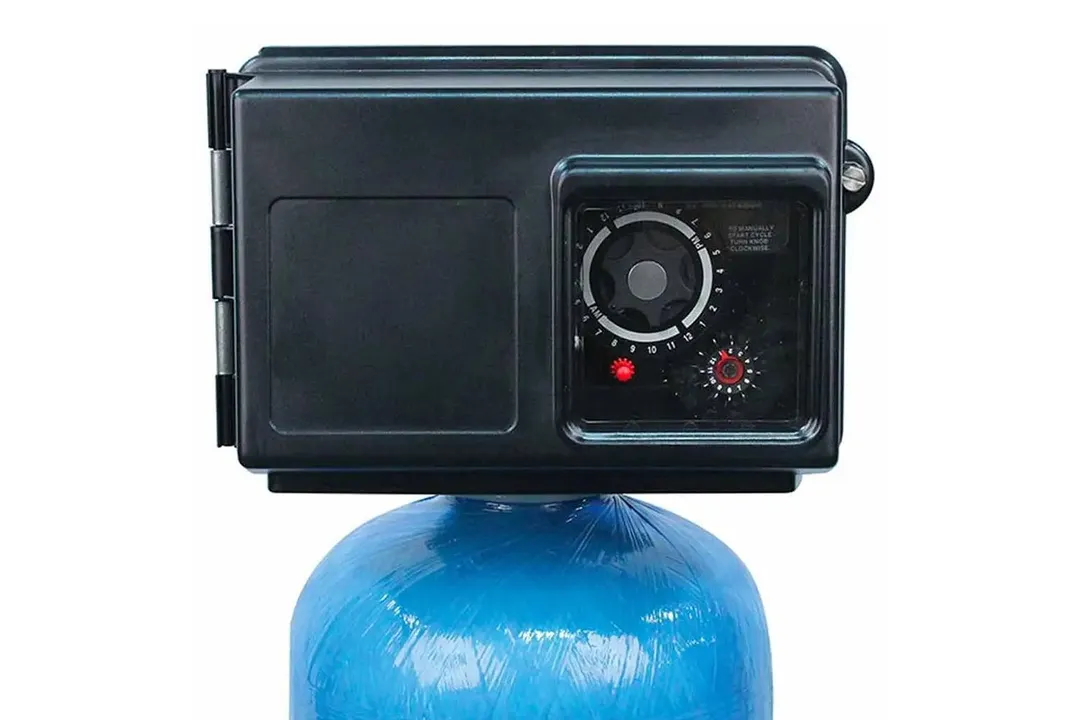
You should set the timer so that the water softener will regenerate at times where you’re least likely to be using water. Often, this is in the middle of the night (around 2 or 3 AM).
On the other hand, a meter-controlled water softener is more sophisticated. It uses a control head that can measure the amount of water passing through as well as the hardness of that water. As a result, the water softener can regenerate as needed without any manual input.
These systems are also pre-programmed to start their regeneration cycles at times when you’re not using water.
We have already mentioned how, during regeneration, the water softener will go into Bypass Mode. Check either the timer or meter carefully to see if your machine has entered this mode or if a mistake has been made in the settings.
If you find that the timer or meter itself is faulty, replace it.
Insufficient Tank Capacity
This is one of the most common problems. The water softener is working as it should, but it’s unable to produce enough soft water to keep up with your demands.
If this occurs, you may have to replace the entire system with a more capable one. The second option is to simply reduce your water usage.
This is the reason it is so important to carefully gauge your water usage before purchasing.
Overflowing Brine Tank
If you check the brine tank and see that it’s full of water, that’s a problem. Even if the water only fills half the tank, it’s already a sign of a malfunction.
The water level should be around 2 to 3 inches below your salt level.
There are a myriad of reasons why this may occur.
Safety Float Malfunction
All water softeners come with a safety float. Its job is to prevent this exact situation. It continuously measures the water level, shutting off the water flow if the tank fills up.
So, if an overflow happens, there is a good chance that the safety float is not doing its job. Fortunately, it is fairly simple to check on the float.
Remove the float from the assembly and wash it under hot water for a couple of minutes. Return the float back to the system and see if it floats freely. There will also be a small ball at the bottom of the float. Make sure that it is free-moving, as well.
If the float doesn’t seem to be floating right, you may have to replace the entire assembly.
Faulty Brine Line
The brine line feeds water between the media tank and the brine tank during regeneration. If the line is improperly attached, it may not mediate the water input and thus will allow the brine tank to overflow.
Clogged Drain Line
Spent water is disposed of via the drain line. If it is clogged and water cannot drain properly, the tank will overfill itself.
Check the state of the drain line and clean up any obstruction that you find.
If you don’t see any obvious obstruction or clog around the mouth of the drain line, the blockage may be deeper inside. Inspect the whole line and clear out any clogging within.
Water Softener Not Using Salt
If you notice that the brine tank’s salt level never changes, chances are high that the water softener is not consuming salt.
For ion exchange (and thus, the softening effect) to occur, salt must be pumped through the system. If the tank stays full of salt, then the system isn’t working. A few situations can cause this.
Salt Bridges
The first thing to check for is a salt bridge.
In simple terms, a salt bridge is a solid crust that builds up on top of the water inside the brine tank.
Most of the time, salt bridges are very difficult to detect visually. When viewed from the top of the tank, the salt layer looks completely normal. However, underneath this solidified salt crust, there’s nothing but empty space and water. This prevents the water softener from regenerating and causes it to perform erratically.
Oftentimes, people only find out about the salt bridge when their water softener starts to lose efficiency.
Fortunately, this is a trivial problem to fix. All you have to do is use a pole or similar implement to break up the bridge. We recommend you replenish the salt at this point as well.
If there’s no salt bridge, then the only other explanation is that there is a component failure inside of the system.
Component Failure
Pull out your user’s manual and perform a diagnostic test to see which component has failed.
If the timer or the control head doesn’t respond to your command, then it’s faulty and must be replaced.
If the timer or control head responds to your command but the valve motor doesn’t activate, replace the valve motor. The valve motor’s job is to move the rotor valve which directly controls the flow of water into the brine tank.
The third scenario is that the valve motor moves, but the rotor valve doesn’t. In that case you’ll need to replace the faulty rotor valve.
The fourth and final possibility is that the venturi is clogged. The venturi admits water into the brine tank. Replace it if it’s clogged or damaged.
How to Replace a Failed Valve Motor
If your valve motor needs replacement, you’ll first have to get your hands on a suitable motor. Check the user manual or contact the manufacturer to get information on what part to buy.
Once you do and are ready to begin the replacement process, shut down the water softener and disconnect it from power.
Unfortunately, we cannot provide detailed instructions on how to access the valve motor as each softener’s design is a little different. Refer to your user manual or watch online disassembly tutorials for your model. They can help you to figure out where the valve motor is located and how to access it.
There is typically a wire connecting the valve motor to the timer or control head. Once this wire is disconnected, the valve motor should come free.
If it is screwed down onto the machine, remove the attachment screws. Do what’s needed to separate the motor from the water softener.
Put the new motor into the old motor’s place. Replace any fasteners and reconnect all of the connecting wires. In other words, reverse the disassembly process that you just did with the old motor.
Reinstall everything that you removed and plug the water softener back in. Power it on and run a diagnostic test to see if everything is in working order.
Water Softener Resin Bed Issues
The resin bed, like we mentioned earlier, is a critical component of a water softening system. Usually it is quite durable and in most cases can outlast the rest of the system. However, this is not a guarantee. The resin bed can still fail unexpectedly.
A symptom of a failing resin bed is an unusual decrease in the salt level. An inefficient resin bed uses more salt in the ion exchange.
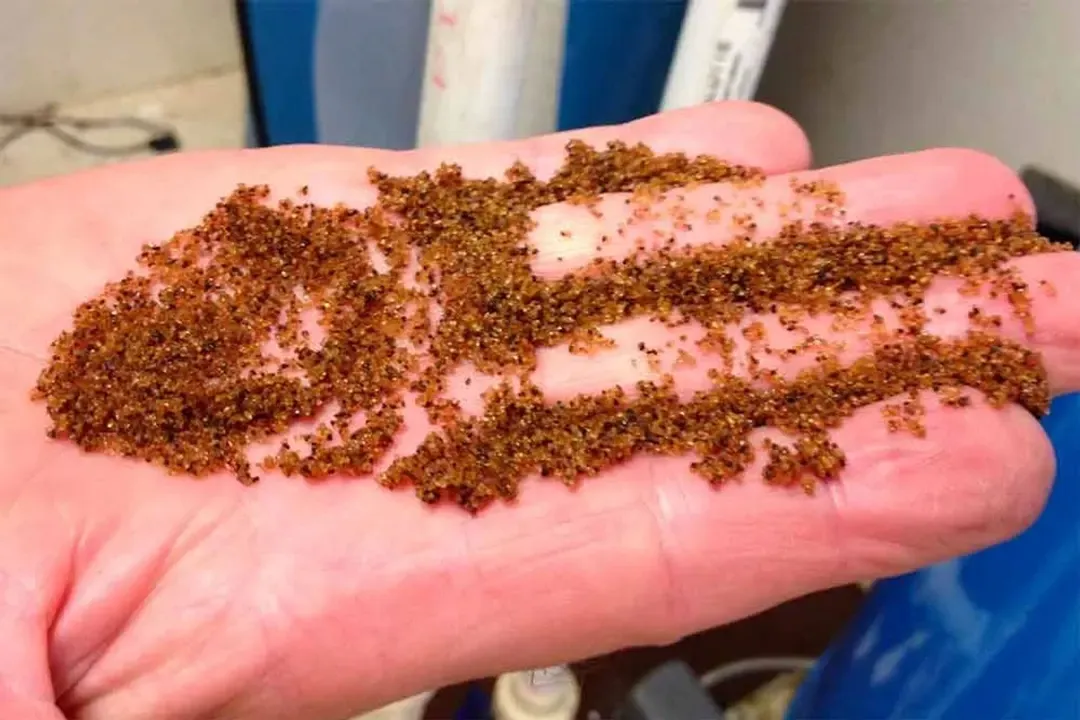
If that is the case, you will have to replace the resin bed. Be warned, though, that this is a fairly complicated process. New resin will cost you around $100 to $150. The entire replacement process can take up to 4 hours to complete.
How to Replace the Resin Bed
Sizing
First, size your water softening system to see how much resin bead material you will need. If your manual doesn’t specify the amount, you must measure the diameter and the height of your resin tank.
A simple measuring tape is good enough to give you an approximation of the diameter. Measure from one side of the tank’s rim, through the center, and to the other side. The number will not be perfectly accurate, but it should be close enough for you to proceed.
Combine the diameter with the height of the tank. Then, use the following table to determine the volume of beads you will need.
Size (Diameter x Height) | Amount of Beads |
|---|---|
8”x35” | 0.64 cu.ft. |
8”x44” | 0.75 cu.ft. |
9”x35” | 0.75 cu.ft. |
9”x48” | 1.00 cu.ft. |
10”x35” | 1.00 cu.ft. |
10”x40” | 1.00 cu.ft. |
10”x44” | 1.25 cu.ft. |
10”x52” | 1.50 cu.ft. |
13”x54” | 2.00 cu.ft. |
You can buy resin online through water treatment companies and stores.
Though it can be expensive, we absolutely recommend you buy high-quality resin beads rather than the cheaper ones.
While you’re shopping, you should also add to your cart a resin funnel, a riser tube, and some gravel if the user manual demands it.
Switch Into Bypass Mode and Conduct a Manual Regeneration
In order to safely conduct a replacement, switch the water softener into bypass mode. Open the bypass valve. If your model doesn’t have such a valve, turn off the main water valve to cut off all water instead.
Perform a manual regeneration cycle on your water softener. There should be a valve or button labelled “REGEN” on the primary control panel. If you can’t find it, refer to your user manual.
By performing manual regeneration, the system will flush itself and bleed the unit’s internal pressure.
Disconnect the Softener
Find the unit’s valve head. Often, the valve head is connected to the bypass valve via several fasteners. Disconnect the fasteners found here and the softener will be free from the house’s plumbing.
During the process, you will encounter several seals and O-rings. It’s a good idea to take pictures or record videos of their correct positioning for later reinstallation.
The softening unit will also be connected to several electric lines. Disconnect them from the unit as well.
Remove the softener once it’s free.
Dump the Resin
Remove the valve head from the head of the tank. Ask a friend or an assistant to keep the tank still while you’re unscrewing the head.
When the head is off, put it somewhere safe, and pour the resin from the tank into a bucket. If your unit uses gravel in conjunction with resin beads, the gravel will also come out.
Take off the riser tube inside of the tank. Since you will be replacing it, you can discard this one.
Pour the resin and gravel out of the tank until it is completely empty.
Refill the Tank
Install the new riser tube in the tank. Temporarily tape off the mouth of the tube to prevent the new resin beads from falling into it.
If your water softener uses gravel, pour it in first before the resin beads. Shake the resin tank to help the gravel settle at the bottom.
Plug the resin funnel into the top of the tank. Tell your assistant to hold the tank for you as you pour the resin beads in.
Once the tank is full, reverse the steps to reinstall both the tank and the softener apparatus.
Water Softener Causes Low Water Pressure
If you have checked the house’s primary water pipe pressure and it is decent, there’s a good chance that the problem is caused by your water softener. Unfortunately, this is a rather common problem with water softeners.
There are many factors that can cause this issue.
Improper Sizing
Low pressure can occur if the water softener is too small or underpowered to keep up with your family’s water consumption rate. This is one of the many reasons why you must carefully size the water softener before purchasing.
Check the inlet and outlet pressure of the water softener to determine if its throughput is keeping up with the demand. Also, do some quick math to see if the system can supply enough for everyone at peak hours.
The way to approximate this is fairly simple. First, multiply the number of people in your house with the amount of water they use in a day. In the U.S, the average person uses 80 to 100 gallons a day.
For example, if you have a family of four and each person uses around 80 gallons, that’s 320 gallons a day for the entire family.
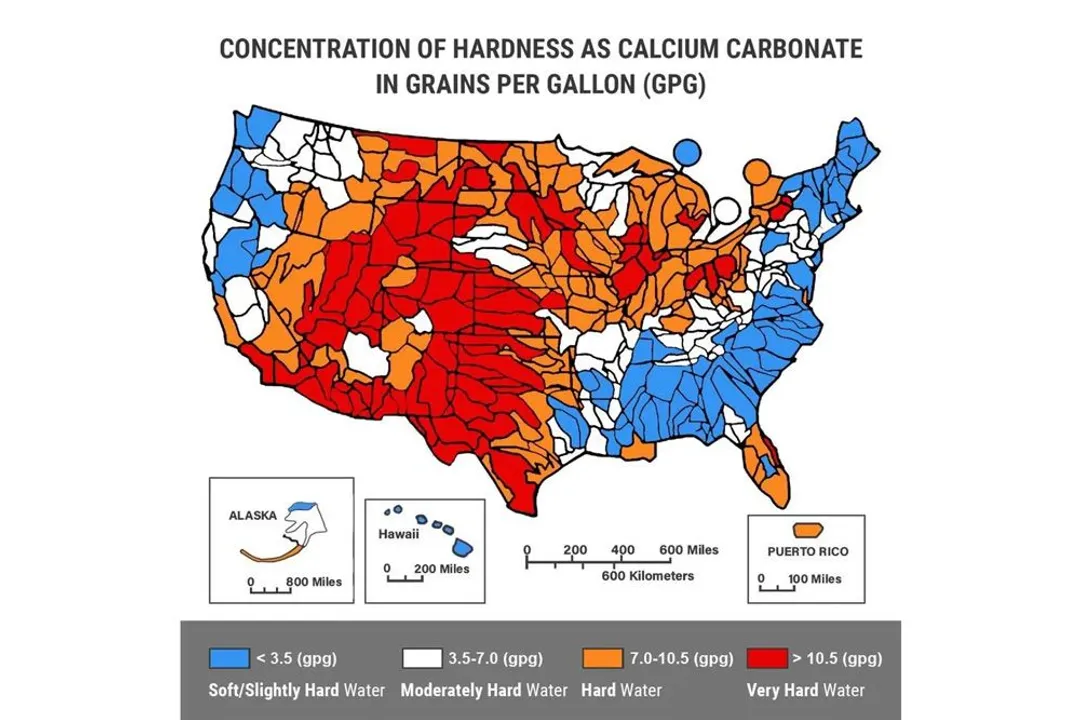
Then, you take the final number and multiply it by the grains of hardness in the water. This is the standard unit of measurement for water hardness (grain per gallon, or GPG). Each grain of hardness equals to 1/7000th of a pound of dissolved minerals like magnesium and calcium.
The higher the measured GPG, the harder the water. You can refer to this table to know what the number means.
Grains per Gallon (GPG) | Classification |
|---|---|
< 1.0 | Soft |
1.0 - 3.5 | Slightly Hard |
3.5 - 7.0 | Moderately Hard |
7.0 - 10.5 | Hard |
> 10.5 | Very Hard |
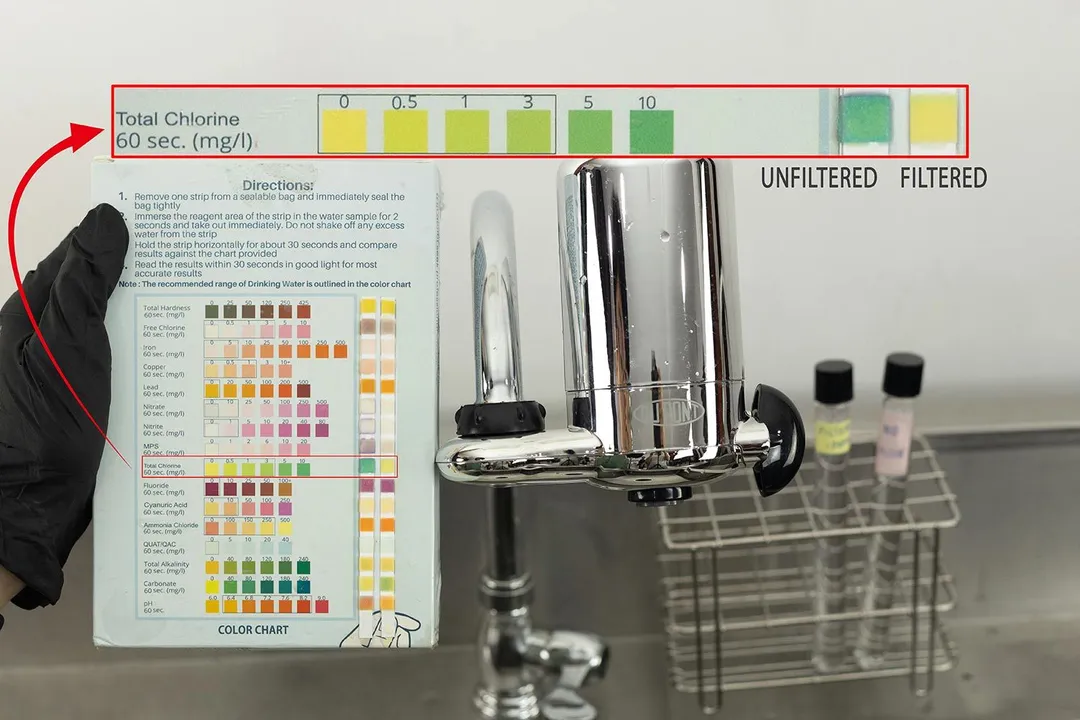
You can contact your local water treatment plant and ask them about the hardness of the local water supply. An alternative and more precise option is to purchase a water testing kit to check the hardness for yourself.
As an example, let’s take the previous family of four that uses 320 gallons a day. Now let’s say that they live in an area whose water supply measures 10 GPG in hardness.
Multiplying those values together, we get the approximate weight of the minerals that the water softener has to remove each day: 3,200 grains.
A common rule of thumb is to get a water softener that’s rated for one week’s worth of hard minerals rather than one day’s. In our hypothetical example, 3,200 multiplied by 7 is 22,400 grains per week.
Water softeners typically come in four sizes: 24,000 grains, 32,000 grains, 48,000 grains, or 64,000 grains.
In this case, a 24,000-grain system will suffice.
Accumulated Sediment
Over time, sediment and mineral scale will build up inside the system. They can clog the valves and pipes, and prevent water from flowing freely. Check the water softener’s plumbing and clear up any congestion that you can find.
Clogs Caused by Flushed Resin Beads
When resin beads get flushed from the system, they can also clump together and form clogs inside of your water softener. If this is the case, we recommend that you change out the resin and perform a manual regeneration cycle. This will promptly wash the clogged resin away.
Accumulated Iron
This scenario is especially common among households with iron-infested water supplies. It is a far more difficult substance to deal with than dissolved calcium and magnesium. Resin beads can deal with the latter two minerals quite effectively. The same cannot be said for iron.
Over time, iron can build up inside the resin tank and foul up the beads.
When this happens, you can use special water softener cleaning solutions. Many on the market are specifically designed to target rust and iron. They can dissolve the built-up iron inside of the resin bed and, with a flush cycle, wash the iron down the drain.
If you know that your local water supply is heavy in iron, use cleaning solutions regularly. Additionally, to minimize build-up, you should set up your water softener to regenerate more frequently. Instead of once a week, set it to regenerate twice or even three times a week.
Water Softener Produces Salty Water
Though salt serves a very important role in a water softening system, your water should not taste salty. If it does, there is a problem.
If you set up your system to use a stronger salt dose than necessary, the output water may become briney. This is a rather simple fix. Just reduce the amount of salt in the brine tank.
Another explanation is that there is a clog inside the drain line. The clog prevents the brine that’s been used to regenerate the system from being disposed of. As a result, the salt water remains inside of the system and causes the salty taste.
Leaky Water Softener
You fix a leaky water softener the same way you fix any other leaky appliance. Find the leaking parts and either repair or replace them.
This can be a rather frustrating and tedious job considering the complexity of the plumbing. Because water softener components are highly durable, most leaks occur because of installation errors. If a part has failed, you can replace it or try to plug the leak using teflon tape.
However, if you’re going to replace the part yourself, check the user manual carefully. Call the manufacturer for advice if needed. The last thing you want is to create even more damage to the water softening system and exacerbate the situation.
Noisy Water Softener
During operation, the water softener should make a low hum. The sound is relatively gentle and soft.
If the sound is grating, loud, or simply “off,” you should check the system for potential issues. Loud sounds can be attributed to clogged water lines or burst air valves. Open up the system, clear up any clog, and repair or replace any broken part that you find.
The problem can also be caused by a broken timer. In this case, simply replace it with a new, functional one.
Conclusion
Despite water softening systems being specifically designed for durability and reliability, they can run into problems from time to time. Not all issues require an expert technician.
But remember, if you’re unsure about a procedure, it’s best to call a professional for help rather than performing water softener repairs by yourself. You do not want to damage your expensive water softener even further.
About your tip

Luna Regina is an accomplished writer and author who dedicates her career to empowering home cooks and making cooking effortless for everyone. She is the founder of HealthyKitchen101.com and HealthyRecipes101.com, where she works with her team to develop easy, nutritious recipes and help aspiring cooks choose the right kitchen appliances.