Our recommendations are made independently through Research & Testing. We may receive commissions from purchases made via our links.
How to Sharpen a Pocket Knife: Pro Tips
Never struggle with outdoor cutting tasks again. Learn how to sharpen a pocket knife with and without a stone.
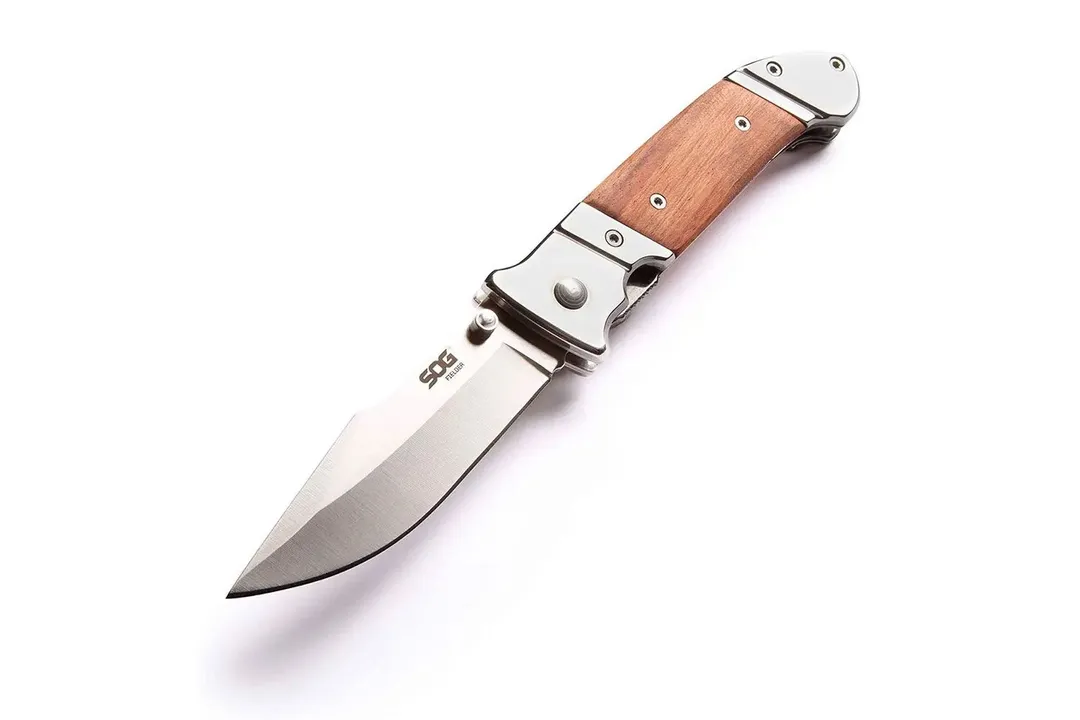
The handy pocket knife is one of the most versatile tools: use it to cut fruit in the kitchen, scotch tape or strops in the garage, or as a hunting and camping knife outdoors. As such, it’s important to learn how to sharpen a pocket knife, especially if you’re the type who carries one around on a regular basis.
The Best Way to Sharpen a Pocket Knife
You may have guessed that not all kitchen knife sharpeners are ideal for pocket knives, but why not?
The biggest issue is bevel angle. Most kitchen knives have a bevel of between 15 and 20 degrees. It allows them to make precision slices.
Everyday utility knives like the one in your pocket or hunting kit need to be a bit more rugged, though. To keep the blade from being easily damaged, these knives usually have a bevel of 22 to 30 degrees.
That means your fixed-angle pull-through kitchen sharpener won’t work for your pocket knife. Other techniques, though, can still be used.
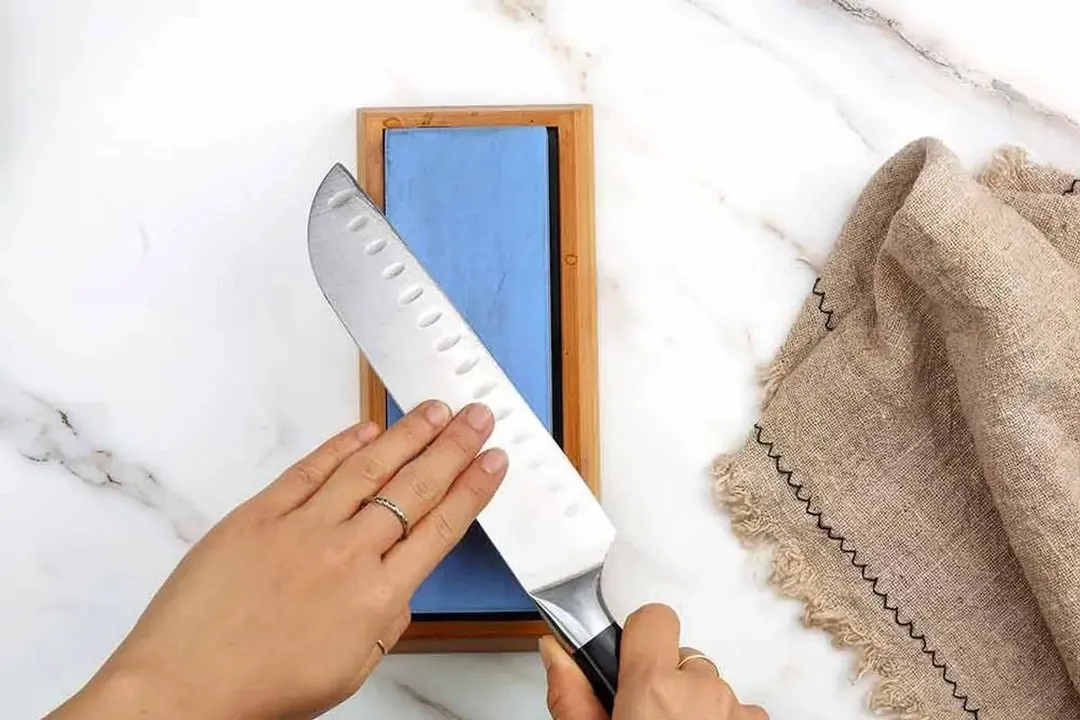
The best way to sharpen a pocket knife is to use one or a series of whetstones.
How to Sharpen a Pocket Knife with a Whetstone
The term “whetstone” literally means “sharpening stone.” It’s a type of rock with exactly the right abrasive properties for sharpening steel blades.
Modern whetstones are often manufactured artificially to have the right level of grit and a perfectly flat surface. These are the simplest to use. Some kits even include an angle-guide accessory to reduce the guesswork. Some whetstones have a coarse grit on one side and finer grit on the other.
Here are the basics of sharpening your knife using a whetstone:
- Find out the angle of your blade’s bevel. If you don’t know it, you may have to consult the manufacturer’s website. Or if you have good vision, do your best to align the bevel with the stone.
- Set the whetstone on a level surface where it won’t slide. You want to start with the coarse grit unless you’re just doing a minor touch-up of the edge. If your whetstone kit includes oil, spread a bit of it on the surface of the stone.
- Set the blade against the surface of the stone at the same angle as the bevel. Hold the handle in one hand and place the fingers of the other on the flat of the blade. Apply just a little downward pressure— it doesn’t take much!
- Pull the knife slowly towards yourself while simultaneously drawing it to the side so that the whole of the edge gets attention with each stroke. Do your best to keep the angle consistent the whole way. Make several passes like this.
- Feel the edge carefully with your thumb. If things went right there should be a slight ‘burr’ of metal along the edge which curls away from the stone side.
- Flip the knife over to sharpen the other side. This will remove most of the burr. Feel free to do a paper-slice test after finishing with the coarse grit stage. The bulk of the sharpening happens on the coarser stone.
- Switch to the fine stone and repeat the process. This will polish and fine-tune the edge.
- Always rinse off your knife and stone when you’re done.
Note: This is just one technique among many. Different whetstone users use different motions, so feel free to explore the internet for the technique that works best for you.
How to Sharpen a Pocket Knife with a Stone
Professional whetstones— especially the artificially produced ones— haven’t been around forever. Various types of stone have been used as sharpening tools for as long as metal blades have existed.

If you’re out camping, or otherwise without access to a good sharpening tool, you can try using a river rock. Try to find one with a relatively large, flat surface. You may have to modify the whetstone procedure a little, but the basics remain the same.
Realize your results may not be quite so consistent this way. It will also take longer to get the edge you want.
How to Sharpen a Pocket Knife Without a Stone
Certain other sharpening tools that can do the trick.
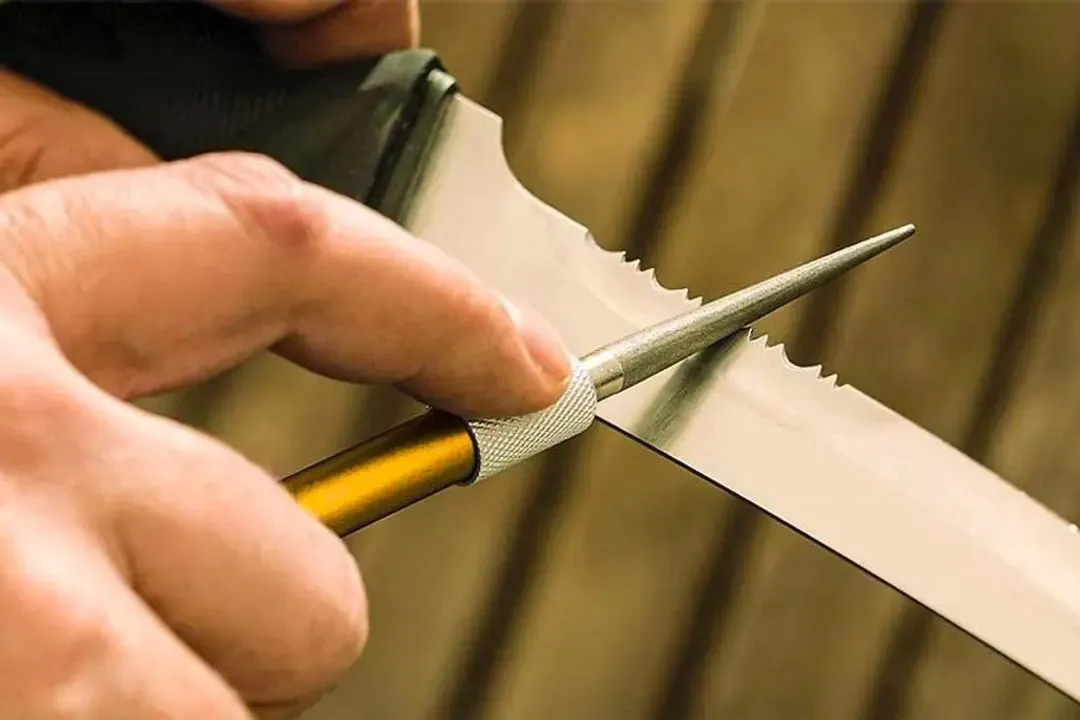
Sharpening steel (or other honing rods) work just as well for pocket knives as for kitchen knives. All you have to do is adjust your angle of attack.
There are also other tools with a design that targets pocket knives. Many come in the form of a tapered rod coated with diamond dust for sharpening serrated or mixed edges.
Similarly, stropping leather (and other flexible honing and stropping aids) can be used on any blade. These tools only hone the blade, of course, but often that’s all it really needs.
How to Sharpen a Pocket Knife with Household Items
If you really want to MacGyver your way to a sharp edge, there are certainly some options at your disposal. Again, these are less ideal than true sharpening stones, but they get the job done.
The most common makeshift sharpener is a ceramic dish or mug. This will probably come as no surprise since many of us saw our grandparents swiping away at their dishes long ago. Large plates are the most ideal. Here’s what to do:
- Flip your dish over on a flat surface. In nearly all cases, the ring of ceramic that normally sits on the table is not glazed. That’s what you want.
- Align your knife on that unglazed edge similar to how you would on the whetstone.
- Draw the edge across while maintaining the right angle. It may take quite a few passes if your blade is dull.
- Repeat on the other side.
Ceramic materials are naturally very hard and non-flexible. They’re also slightly abrasive. Doing just a few passes like this is essentially a honing technique— it’ll smooth out imperfections without removing appreciable amounts of metal. Enough passes on the dish will have an effect similar to a fine-grit stone.
Other options that can work in a pinch are sandpaper or emery boards. These are tricky to use since it’s hard to keep them stable. Get creative and brace your makeshift tool. Just be sure not to use high-grit sandpaper— you don’t want to take big divots out of your knife.
There you have it. Now you can keep not only your kitchen cutlery but also your utility knives super sharp.
About your tip

Luna Regina is an accomplished writer and author who dedicates her career to empowering home cooks and making cooking effortless for everyone. She is the founder of HealthyKitchen101.com and HealthyRecipes101.com, where she works with her team to develop easy, nutritious recipes and help aspiring cooks choose the right kitchen appliances.

Anh Ngo is a writer with 9 years experience at different media outlets, covering from public news and events to product testing and analysis. At HealthyKitchen101, she works across different departments, communicating closely with its network of writers, editors, and health, tech, and search engine experts to provide a meaningful and pleasant reading experience for visitors.