Our recommendations are made independently through Research & Testing. We may receive commissions from purchases made via our links.
How To Install a Garbage Disposal
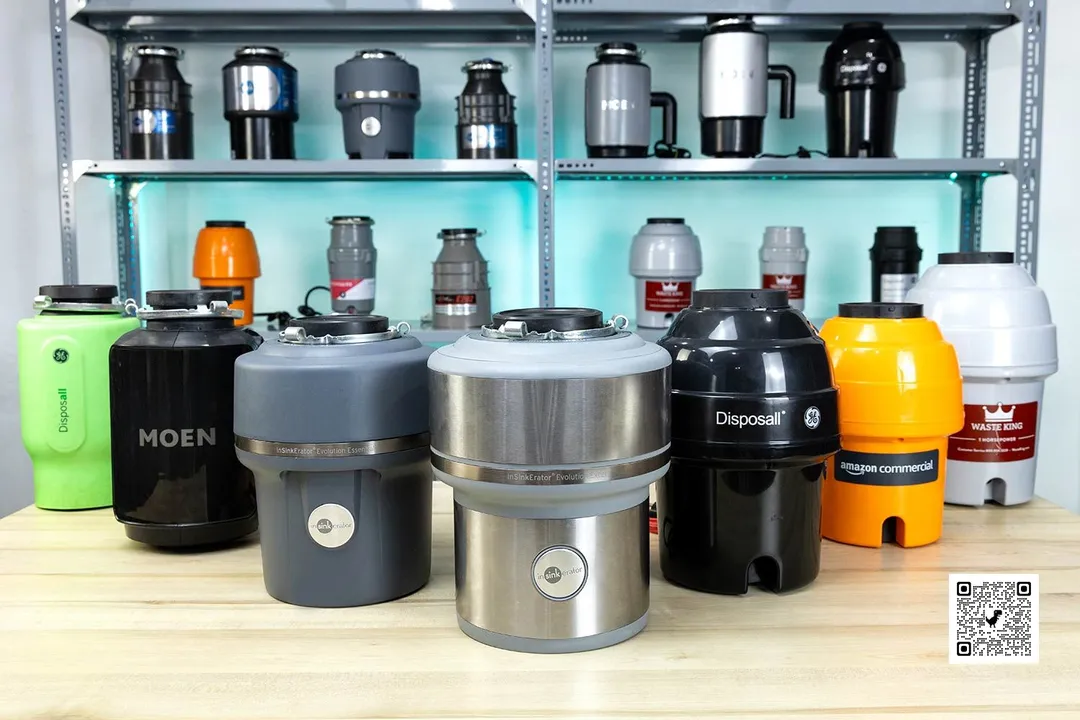
Learning how to install a garbage disposal should not take you more than half an hour and it’s gonna save you a big bag of cash. Usually, it only take us less than an hour to do possibly 3 major step: hardwiring, mounting the unit and reconnecting the drain pipes/dishwasher.
It’s a relatively common complaints among house owners, evidently, that installation of garbage disposals is too expensive. That’s why so many people have been trying to learn how to install a garbage disposal themselves.
Average duration of the whole process, including cleaning up, is about three hours, and hourly cost for labor will range from $20-40$. Meaning, we normally have to pay about $100 to hire a plumber to install a waste disposal. A Waste King Legend series model costs less than that.
Sometimes we need professional help, true. Then again, sometimes we don’t.
A good case in point is when your disposal units jam or clog (they will, at some point in time). Will you immediately call for help or go through some really simple instructions to solve it yourself?
And if you need more convincing, first of all, it’s not that hard. Second of all, the amount of money that we could save would be worth the efforts. And final of all, it’s good exercise.
It’ll take some time before we get the hang of it, sure; but once we do, basic plumbing works are not that difficult.
If this info post is useful to you in any possible way, please drop a comment to show some love. We’d appreciate that very much. Thanks!
How to Install a Garbage Disposal
There are a few main steps that we should know first so things wouldn’t get confusing during the process.
Basically what we need to do is:
- Hardwire the unit. If it comes with a power cord than this step is not needed
- Set up the sink flange assembly
- Connect the drains and the dishwasher outlet hose
With the dishwasher, before setting up the machine, use a hammer and a screwdriver or strong stick to knock out the knockout plug in the dishwasher inlet of the machine.
Step 1: Power Cord
PREPARATION
Tools: screwdriver, wire strippers (or knife)
Parts: ⅜’’ clamp connectors, pigtail/ 3 wire power cord, wire nuts
HOW IT’S DONE
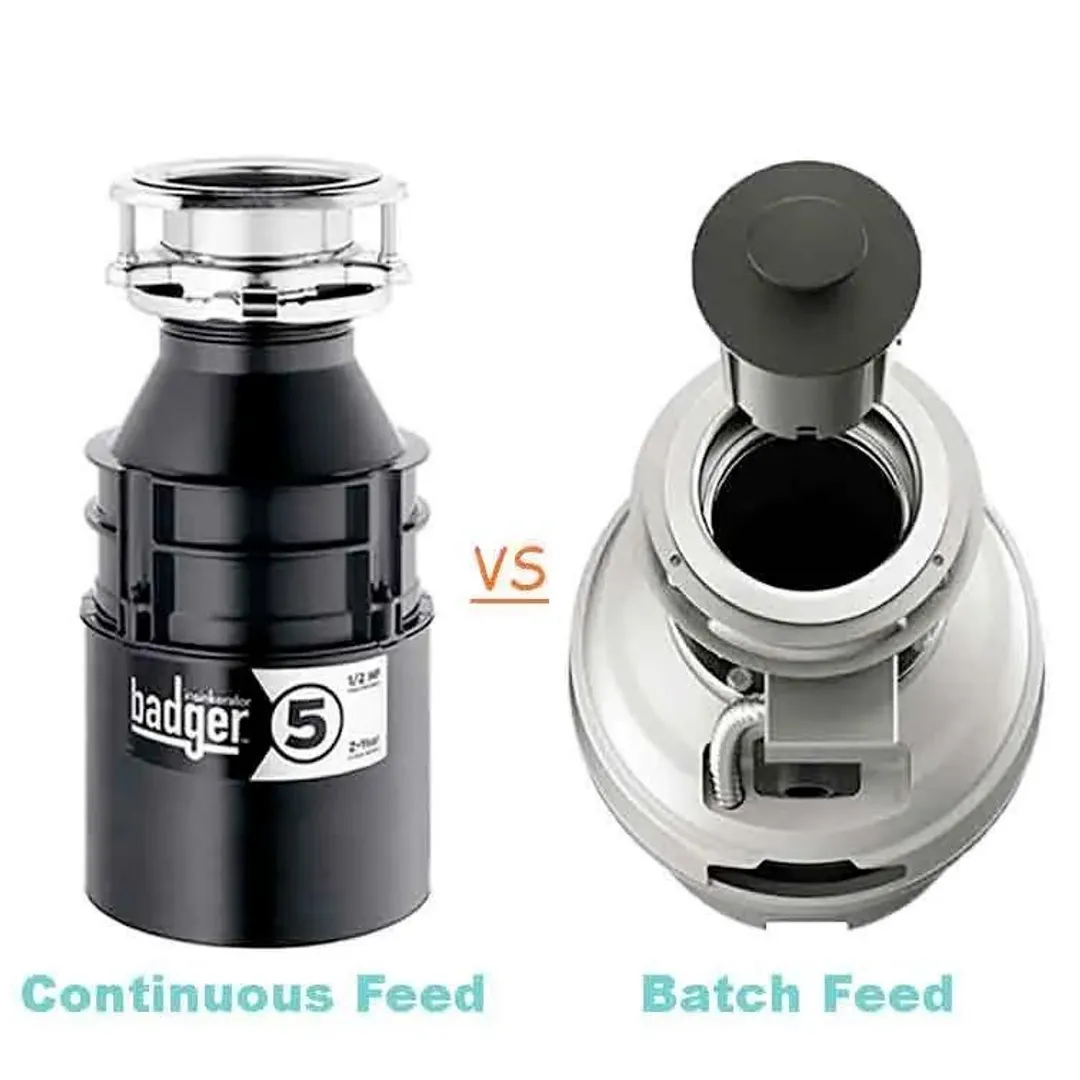
Some waste disposals have power cords, but some are designed to give you the choice between using sockets for power or hardwiring the appliances into your house electrical system.
If you want to hook the unit into your house power line, help from professionals is required to be safe and avoid complications.
In our case, we’ll be using the sockets. So let’s get our unit a tail sticking out of its bum.
1. Flip the item over, on the bottom, there’s a phillip screw holding a square cover. Loosen the screw and remove the cover.
2. Look for a green screw, a black wire and a white wire. They should be right there.
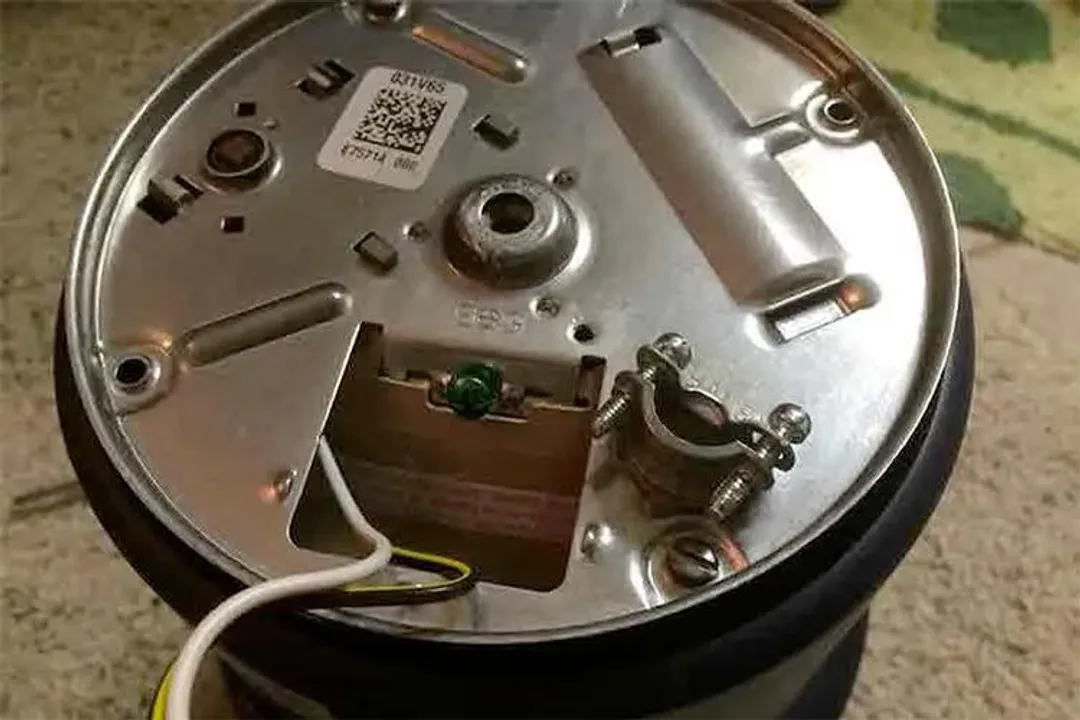
3. Take a clamp connector and twist it on the round hole nearby. Loosen the clamp so there’s enough space for our cord to go through.
4. Pull the cord up from the square hole just far enough to link the cord with the wires.
5. Strip the wires of the unit and the cord, then connect them: white with white and black with black (secure with wire nuts), green wire wrap around the green screw then tighten it.
6. Tighten the clamp to hold the cord in place. The clamp connector helps protect the wire connection when there’s pulling on the cord.
7. Put the square cover back and screw it tight.
Step 2: Sink Flange and The Machine
PREPARATION
Tools: screwdriver, adjustable pliers, plumber putty, wrenchette (usually packaged in)
Parts: sink flange set
HOW IT’S DONE
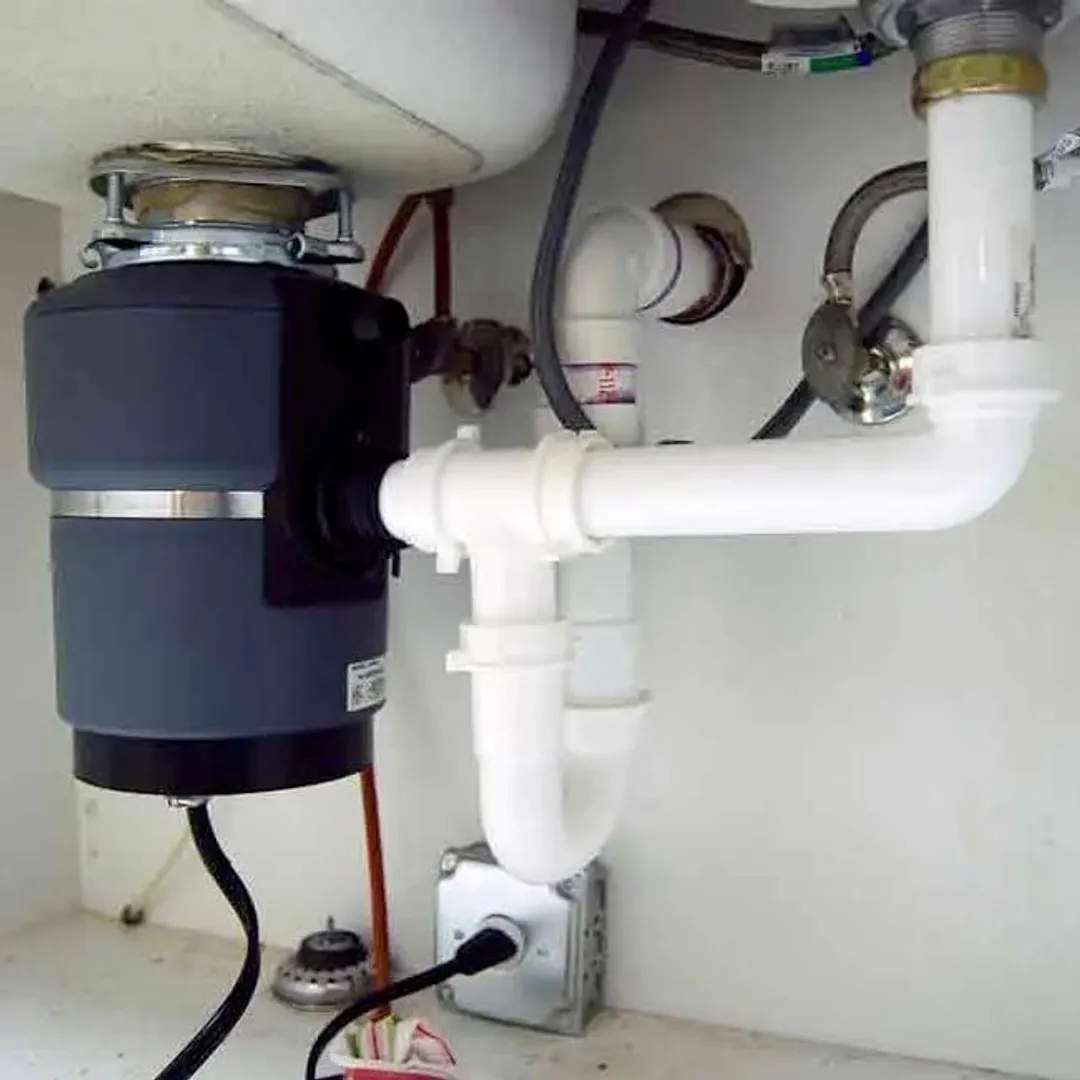
In the picture, items from B to G are our subjects to be handled. It’s a lot easier than it may seem. However, that is in no way suggesting careless work, unless you want a leaking food disposer later on.
Let’s take it easy and step by step:
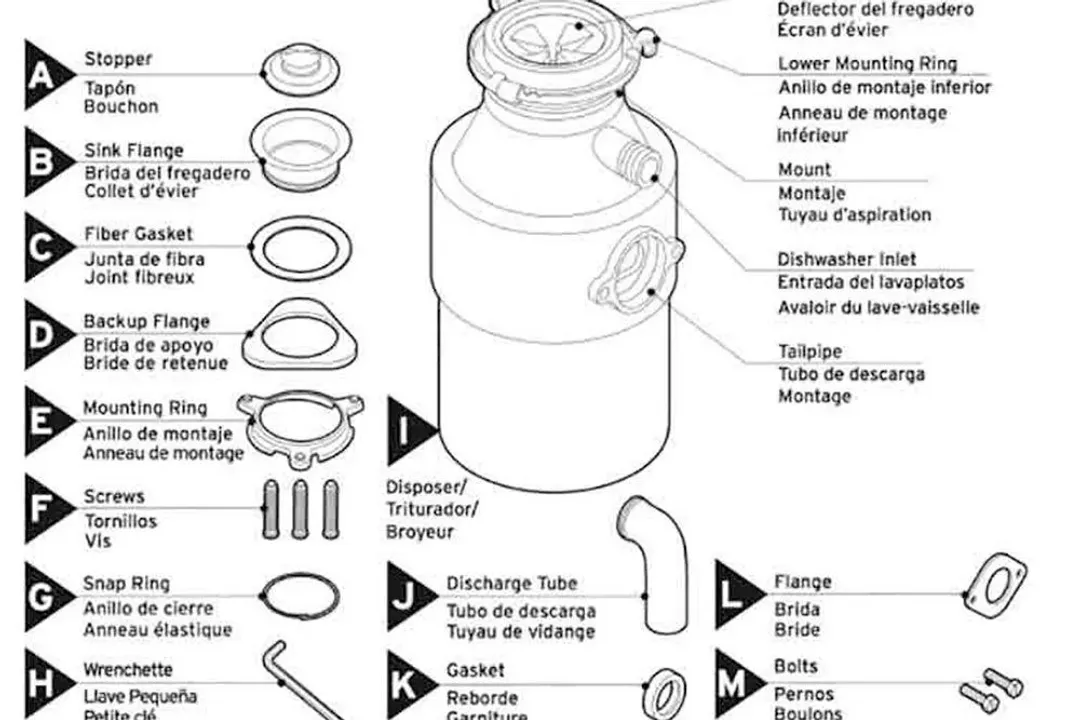
Also, check out this video on support.insinkerator.com to grasp a practical sense of the structure and disassembly of the set.
Before putting in a new sink flange, the existing strainer has to be taken off. That means fiddling with the drain pipes. Steps are as follows:
- First thing first: disable all power sources in the undersink area
- Remove the pipes, the P-trap and the dishwasher outlet hose to make room for the machine, usually under one sink
- Use pliers to loosen the nut of the strainer flange then push the flange up/off.
- Clean up old plumber’s putty or debris off the sink opening.
Now we take the assembly apart and put in in place.
- Loosen the 3 bolts so there’ll be less pressure on the snap ring
- Use a screwdriver for leverage to pop the snap ring out
- Remove the sink flange out of the assembly. It goes in the sink..
- Use plumber’s putty to make a worm size circle and place it around the sink opening (from 1:15 to 1:23 in the video) or wrap the putty around the flange then place it in the opening.
- Go under sink, remaining parts of the assembly go against the sink like this: fiber gasket, backup flange, mounting ring. Hold them in place with your hands
- Use a screwdriver to lever the snap ring in. That should complete the set and hold the parts in place.
- Tighten the 3 bolts evenly. Give them each a few twists at a time.
- Remove excess putty in the sink. There should be pressure on the sink flange and putty will get squeezed out.
After all that, we hook up the unit to the mounting (from 2:20 to 3:00) in the video
- Align the tabs on the mounting set to the the ramps on the lower mounting ring (on the unit) and turn to lock.
- Secure the lock with screwdrivers or wrenchette.
Step 3: Drain Pipes and Dishwasher
PREPARATION
Tool: screwdriver
Parts: rubber gasket, flange, 2 bolts, discharge tube, existing drain pipes.
HOW IT’S DONE
In the video, there’s no need for the flange and the rubber gasket. The example model is with rubber tailpipe, which is more simple to deal with. To connect the discharge tube in this case, we only have to secure the connection with a clamp on the rubber mouth.
In other cases, we might have to connect the parts with a flange and bolts, which is a bit more complicated but not too much. Here’s what we do:
- Place the rubber gasket in the tailpipe
- The tube should go through the flange on one end and stop it on the other end.
- Put tube and flange in place and secure with the 2 bolts
- Following the video instruction on reconnecting the P-drain and the dishwasher hose outlet.
FINAL STEP: CHECKING
This probably goes without saying but we should always do a few test runs after a installation. Dry the pipes, plug the machine in, let it run and dispose to see if there are any leaks.
A few tips:
- When we remove the drain, a bucket right under the sink is a good idea, helping with making less of a mess if there are water in the pipes.
- If the pipes are metal, use a pipe pliers. If not, hands should be enough, to prevent damage to the drain.
- If you don’t have a wire stripper then a knife would do just fine.
- Sometimes a rubber gasket is supposed to go where we use the putty, don’t use it! Putty is much better against leaks.
About your tip

Luna Regina is an accomplished writer and author who dedicates her career to empowering home cooks and making cooking effortless for everyone. She is the founder of HealthyKitchen101.com and HealthyRecipes101.com, where she works with her team to develop easy, nutritious recipes and help aspiring cooks choose the right kitchen appliances.

Be Nguyen is a writer and product reviewer. Being naturally curious about technology and its real-world applications, Be spent several years in university studying engineering before joining the team at HealthyKitchen101 where he disassembles, tests, and rates household appliances.