Our recommendations are made independently through Research & Testing. We may receive commissions from purchases made via our links.
How We Test Cold Brew Coffee Makers v1.0
Cold brew coffee testing — how we rate the best cold brew coffee makers at Healthy Kitchen 101. Become your own coffee connoisseur.
Cold brewing coffee requires that you soak coffee grounds in water for between 12 and 24 hours. After that, you filter the grounds from the concentrated brew. The process itself is simple enough, but slight differences in design seem to exploit the delicate science of coffee brewing better than others. And, that’s where our testing comes in.
The Types of Testing We Do
We purchase all cold brew coffee makers at our own expense. To thoroughly evaluate them, we put each one through a series of tests and appraisals. From this, we calculate a final score on a scale of 1 to 10:
- Brew quality test: 50% of total score
- Ease-of-use test: 35% of total score
- Overall build quality: 15% of total score
For transparency, all our test results are clearly tabulated and also documented with pictures and video. The tabulation clearly describes the breakdown of each test.
How We Do Cold Brew Coffee Testing
Essentially, we follow the brewing process suggested by each manufacturer. Brewing methods vary somewhat depending on the type of device.
Our hands-on testing of cold brew coffee makers follows these six steps:
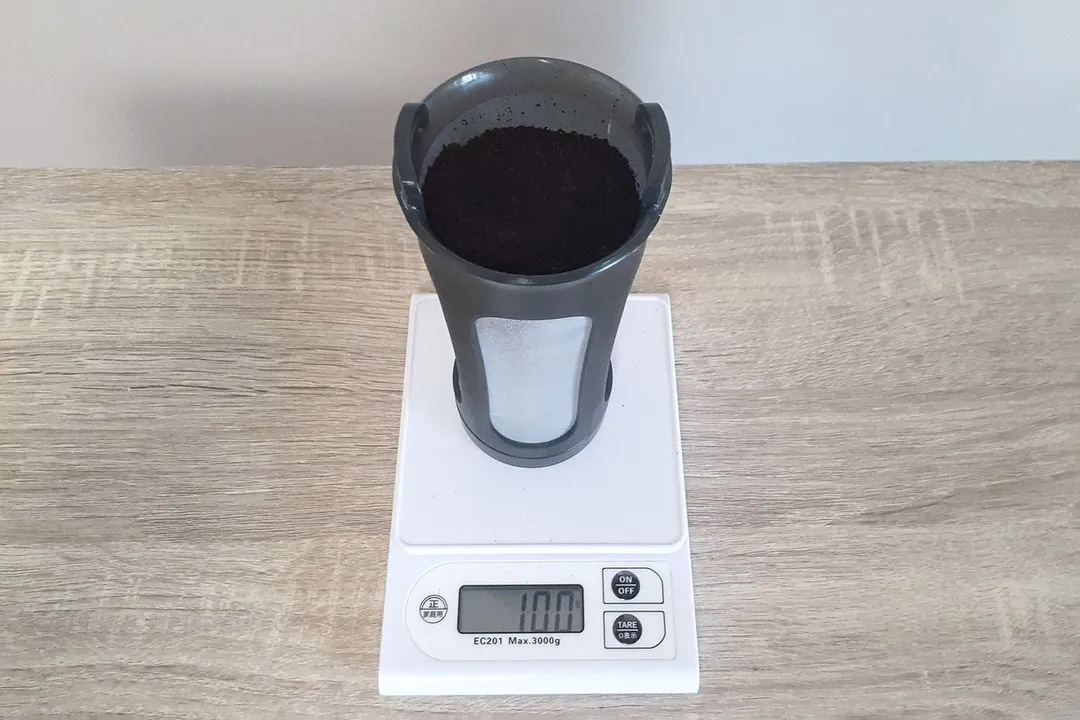
Step 1: Measuring the Grounds
Depending on the design and size, your cold coffee brewer will recommend the quantity of grounds to use, typically measured by weight. Immersion filters tend not to be very flexible in terms of brew volume and you generally can’t adjust the brew ratio for a stronger brew. We make a careful note of the grounds-to-water brew ratio for each device.
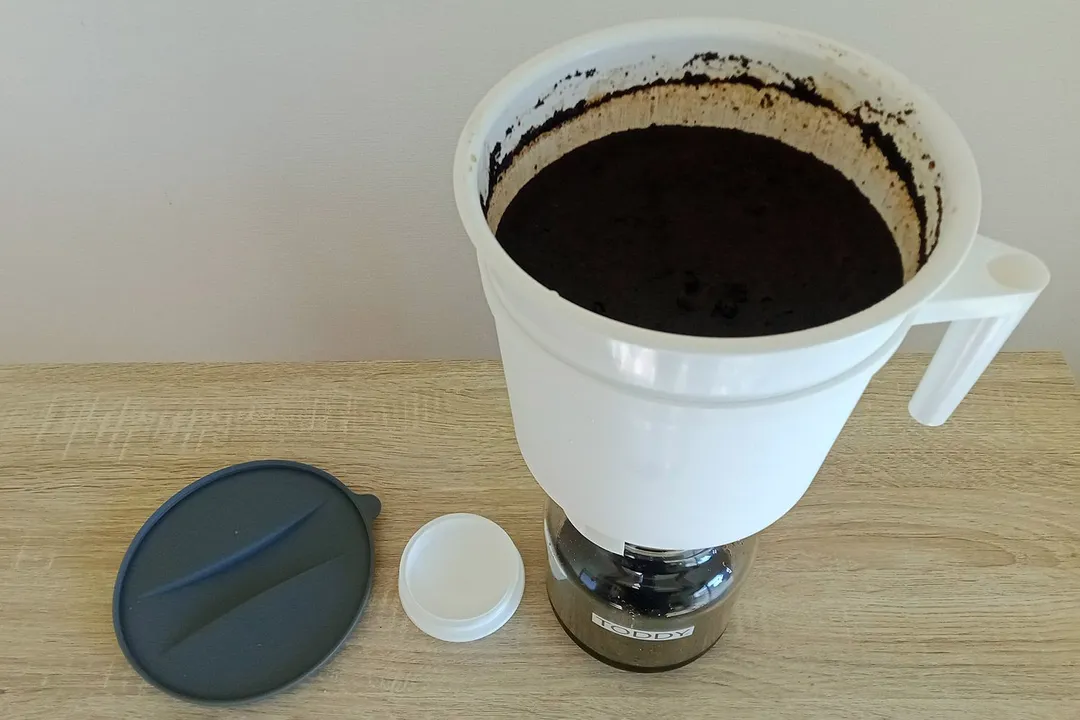
Step 2: Mixing the Grounds and Filtered Water
Some devices call for a staggered introduction of coffee grounds and water. Others simply immerse the filter contraption full of grounds into the jug or brewing vessel of water. Some brewing techniques recommend a little stirring to wet all grounds. Others even suggest periodic shaking of an airtight vessel.
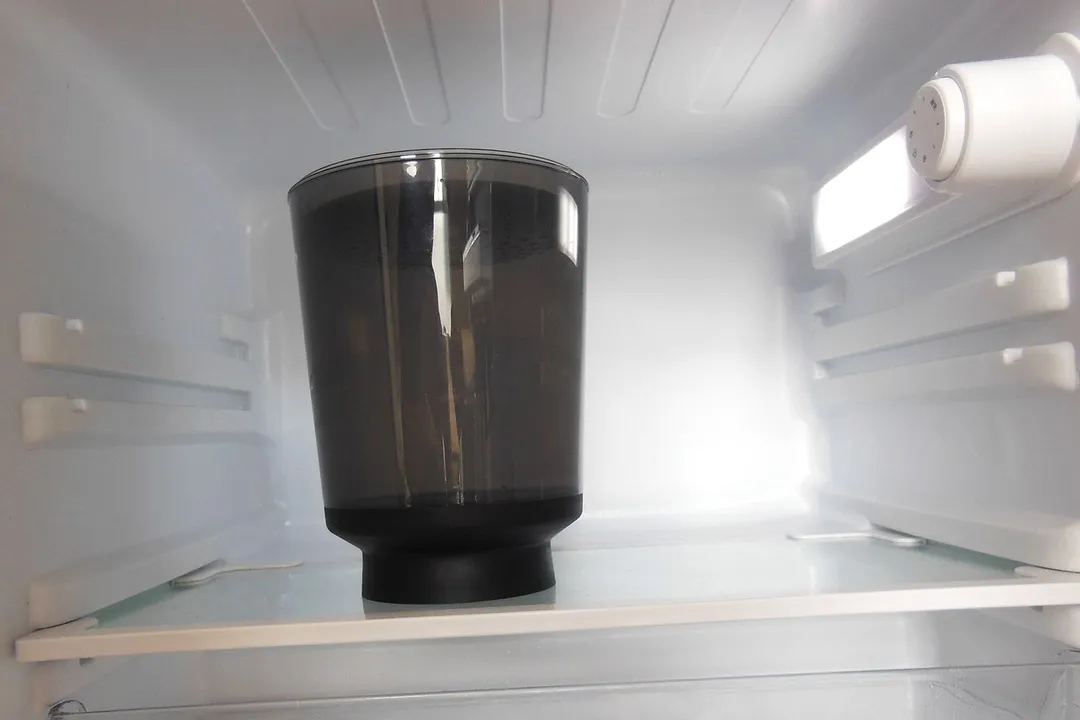
Step 3: Steeping and Brewing
Brewing can be done on the counter or in the refrigerator. To make sure all our results are comparable year round, we brew in the refrigerator. We brew each sample for 18 hours at around 5℃ or 41℉. Most manufacturers recommend 12 to 24 hours. Many coffee experts agree that 18 hours is a good average for extracting a rich and robust flavor.
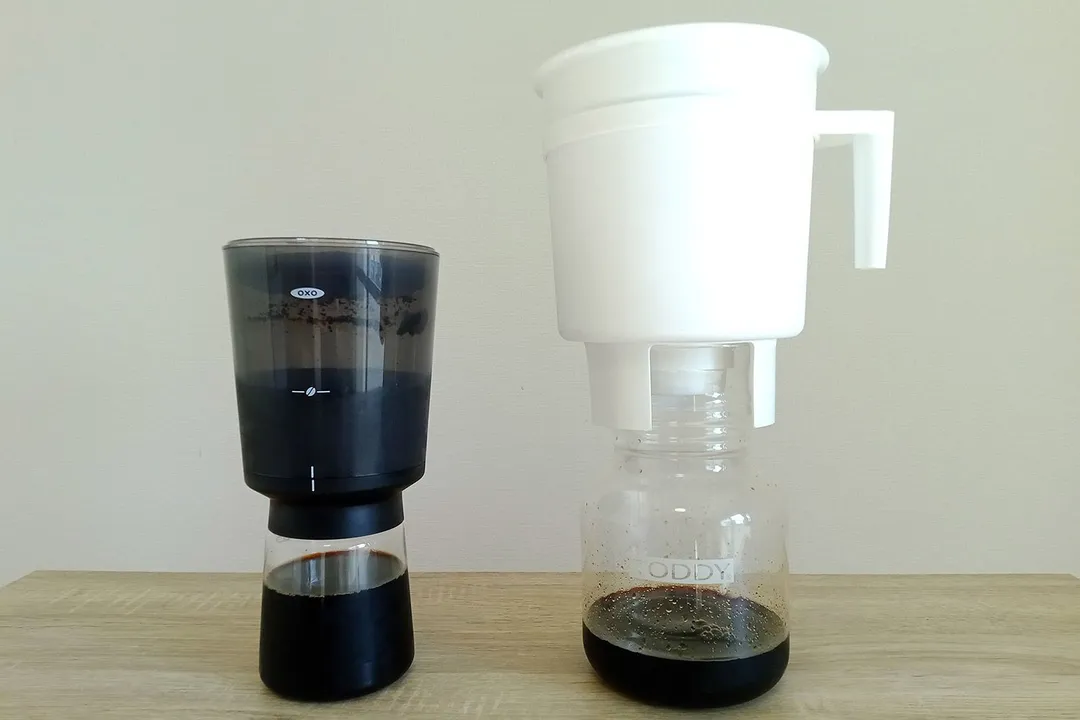
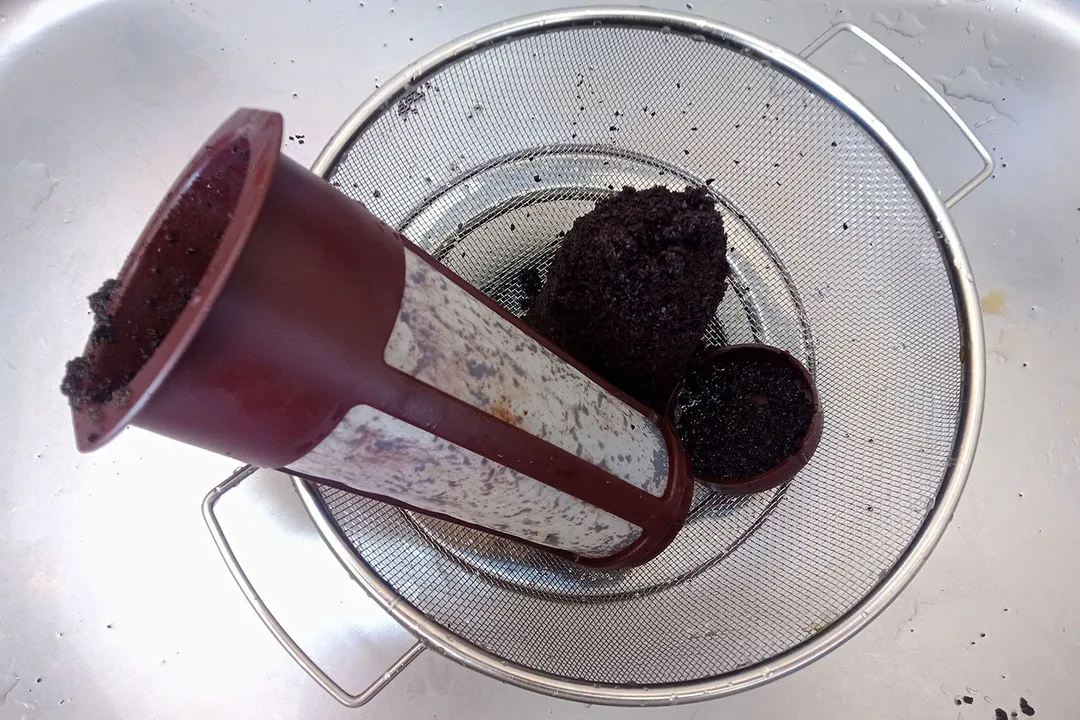
Step 4: Decanting
For immersion filters, we simply remove the filter. Brewers with a separate brew vessel usually decant via a stopper or valve mechanism at the base of the device. Those with mesh filters decant relatively quickly while felt-type filters can take 20 minutes or more.
Step 5: Taste Testing

Each brew is judged by our panel of three coffee appreciators. A brew is first appraised for its bouquet to assess brew subtleties and characteristics. For the drinkability test, we dilute it to a one-to-one ratio or as recommended in the manufacturer’s manual. We mix with filtered water and taste-test the plain coffee with no added sugar or milk. This test is to gauge the flavor profile, smoothness, and aftertaste. Finally, after allowing the brew to settle, we decant the contents to see how much sediment has accumulated on the bottom.
Step 6: Cleaning and Storage
Cold brew coffee concentrate can be kept for up to two weeks in a refrigerator. However, you do need to take care of your brew vessel and/or filter in the interim. We check the ease and practicality of cleaning the filters, brewing vessels, and decanters. We also looked at how convenient it is to store the complete unit when not in use.
Final Considerations
Experts and connoisseurs may prefer to experiment with techniques such as ‘hot blooming.’ In that case, the coffee grounds are initially exposed to hot water for 30 to 40 seconds before the cold water is poured in. We do not use hot blooming in our standard tests.
Equipment We Use for Cold Brew Coffee Testing
Testing cold brew coffee makers is relatively simple. Nonetheless, a good dose of patience is required while your coffee quietly brews for half a day or more. Here are the items we used on every test:
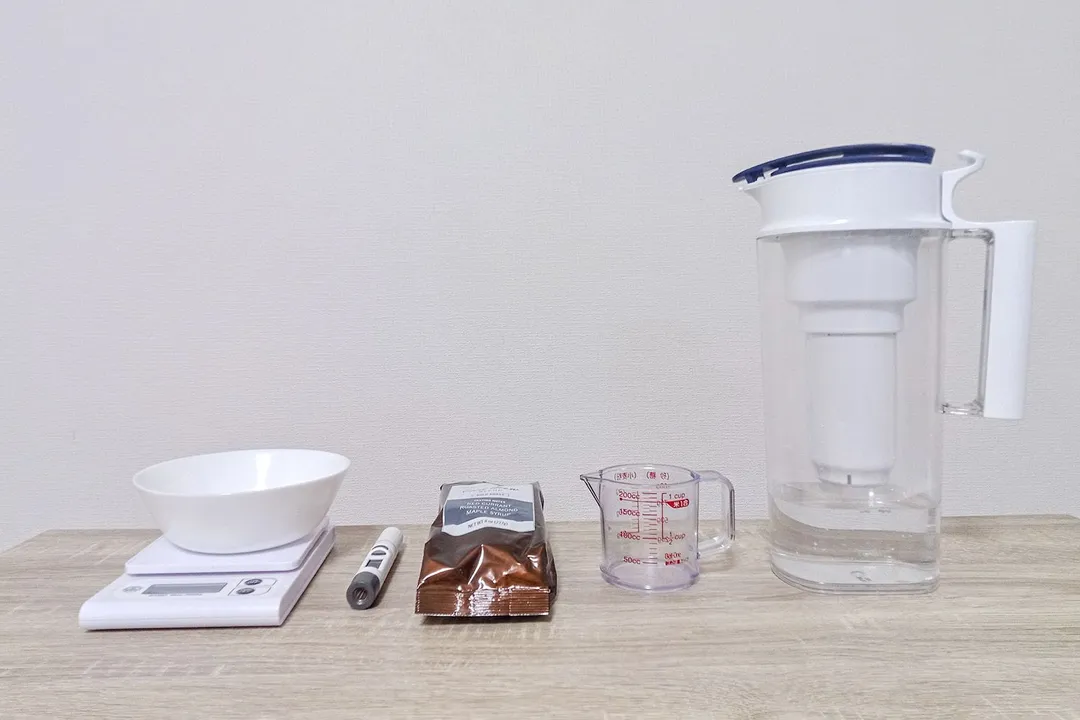
- A countertop water pitcher filter: To ensure water quality is consistent.
- A thermometer: We start brewing with water at 20℃ / 68℉.
- A scale: To measure grounds to the manufacturer’s instructions.
- A measuring glass: For accuracy in our drinkability tests.
- A refrigerator: To ensure a stable temperature year round.
- A camera: To record key moments in the brewing, decanting, and cleanup.
Since each of the brewers we test generally comes with its own advertised filtration system, we do not do additional filtration. However, we may recommend it after considering the unfiltered test results.
The Type of Coffee Bean We Use

We use a dark roast and a coarse grind in each test. For convenience, we wanted an easily available commercial cold brew blend.
Our comparative tests thus far have been conducted with a bold roast cold brew blend by Dean and Deluca. This cold brew coffee is a blend from Guatemala, Costa Rica, and Brazil. Its dominant (advertised) notes are red currant, roasted almond, and maple syrup.
Of course, the bean you choose is entirely up to you. A darker roast generates richer notes of chocolatey, nutty, or woody flavors. A lighter roast may taste sweeter and fruitier. Connoisseurs may prefer single-roast coffees over blended ones.
Tabulation for Brew Quality Testing
There are 3 subcategories in our brew quality test. Each is rated from 1 to 10 and weighted as follows:
- Bouquet or aroma - 10%
- Drinkability after dilution - 70%
- Sediment and filtration - 20%
The Bouquet Test
For this test, we sample the aroma that is apparent in the decanter after brewing.
- A weak bouquet with no clearly defined notes: 0
- A weak bouquet but at least one clear note: 6
- A medium bouquet with clear notes coming through: 7
- A medium to strong bouquet with some complexity: 8
- A strong bouquet but deeper notes more accentuated: 9
- A strong bouquet with deeper and lighter notes in balance: 10
The Drinkability Test
The drinkability test is of course the key test, and carries 70% of the total score. Since coffee beans vary widely in their profile, we score in terms of broad generalities in the type of body, smoothness, complexity, and highlighting of sweeter flavors.
- Unpalatable with a watery and sour taste: 0
- Drinkable, but not so smooth and lacking character: 6
- Good body but the smoothness is not so well defined: 7
- Full-bodied, smooth to drink, but dominated by one flavor: 8
- Full-bodied, smooth, and strong with a complex profile of flavors: 9
- Full-bodied, smooth, rich, and complex drawing out sweeter flavors: 10
The Sediment Test
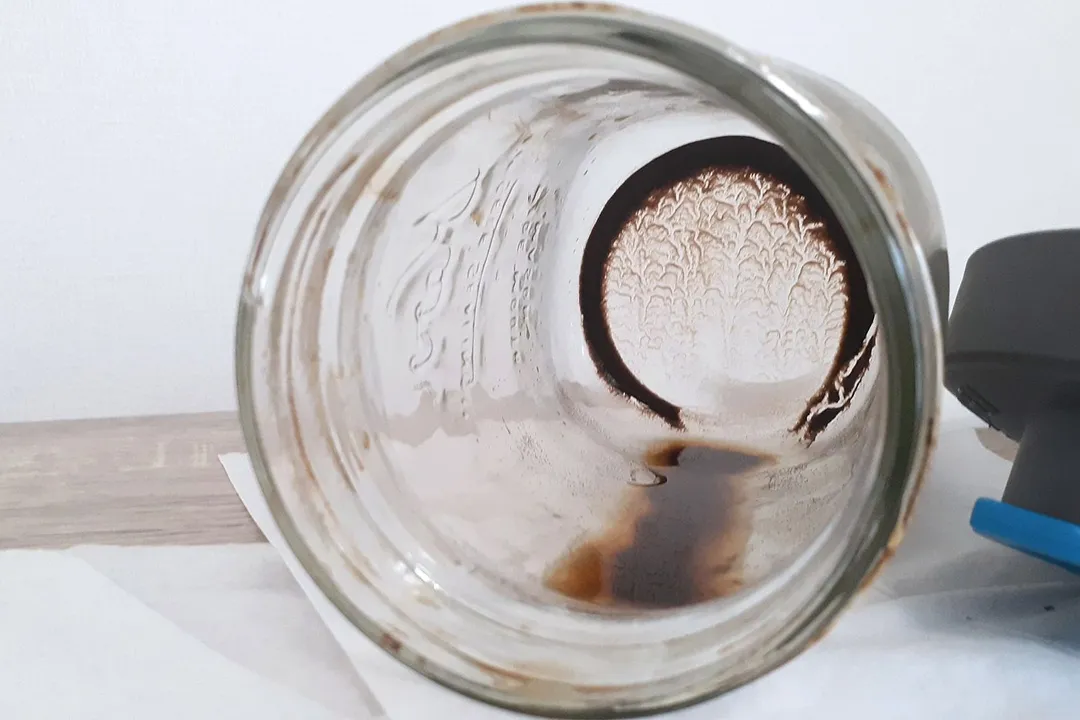
Sediment scores are adjusted to the quality and strength of the brew when using immersion filters. If an immersion filter is very fine and lacks sufficient permeability, the brew is often weak. In other words, the quality of the brew is sometimes sacrificed for the convenience of filtration and cleanup, and the score is adjusted downward accordingly.
- Noticeable heavy sediment requiring additional filtering: 0
- Significant sediment suggesting additional decanting: 6
- Moderate amount of fine to granular sediment: 7
- Some sediment but more fine than granular: 8
- Little sediment and minimal granular residue: 9
- Minimal and fine sediment with no large granules: 10
Tabulation for Ease-of-Use
- Brewing - 45%
- Decanting - 35%
- Cleaning & Storage - 20%
For the ease-of-use test we evaluate the three key steps involved in making cold brew coffee. These are brewing, decanting, then cleaning and storage. They are proportionally weighted on a single scale from 1 to 10:
Brewing (40%)
Here we evaluate how simple the brewing process is and the practicality of steps involved. Some factors include measuring guides, type of components, steps involved, and ease of brewing in a refrigerator.
Decanting (40%)
For immersion filters we evaluate how the filter removes and drains and note any issues that arise. We also check how securely the stopper or lid fits the decanter once the filter is removed. For brew vessels with a bottom plug filter, we time how long decanting takes.
Cleaning and storage (20%)
We assess the ease of hand cleaning and whether additional cleaning equipment is required. We also do a part count and note which are dishwasher friendly. For brew vessels with decanters, compactness is a key feature for storage. For immersion brewers, height may limit storage options.
Design - Overall Build Quality
For this evaluation we look at the robustness of the materials and how parts fit together. We consider the durability and the expected longevity of each component. Part of this evaluation includes health and safety assurances and eco-friendliness. Each device is scored on a scale of 1 to 10 and this test is worth 20% of the final score.
Test Developers

Roger Shitaki is a writer, author, and editor. His niches are household appliances, health & wellness, and travel. He’s a freelance contributor to a Tokyo lifestyle website and a leading ophthalmology magazine in Asia.