Our recommendations are made independently through Research & Testing. We may receive commissions from purchases made via our links.
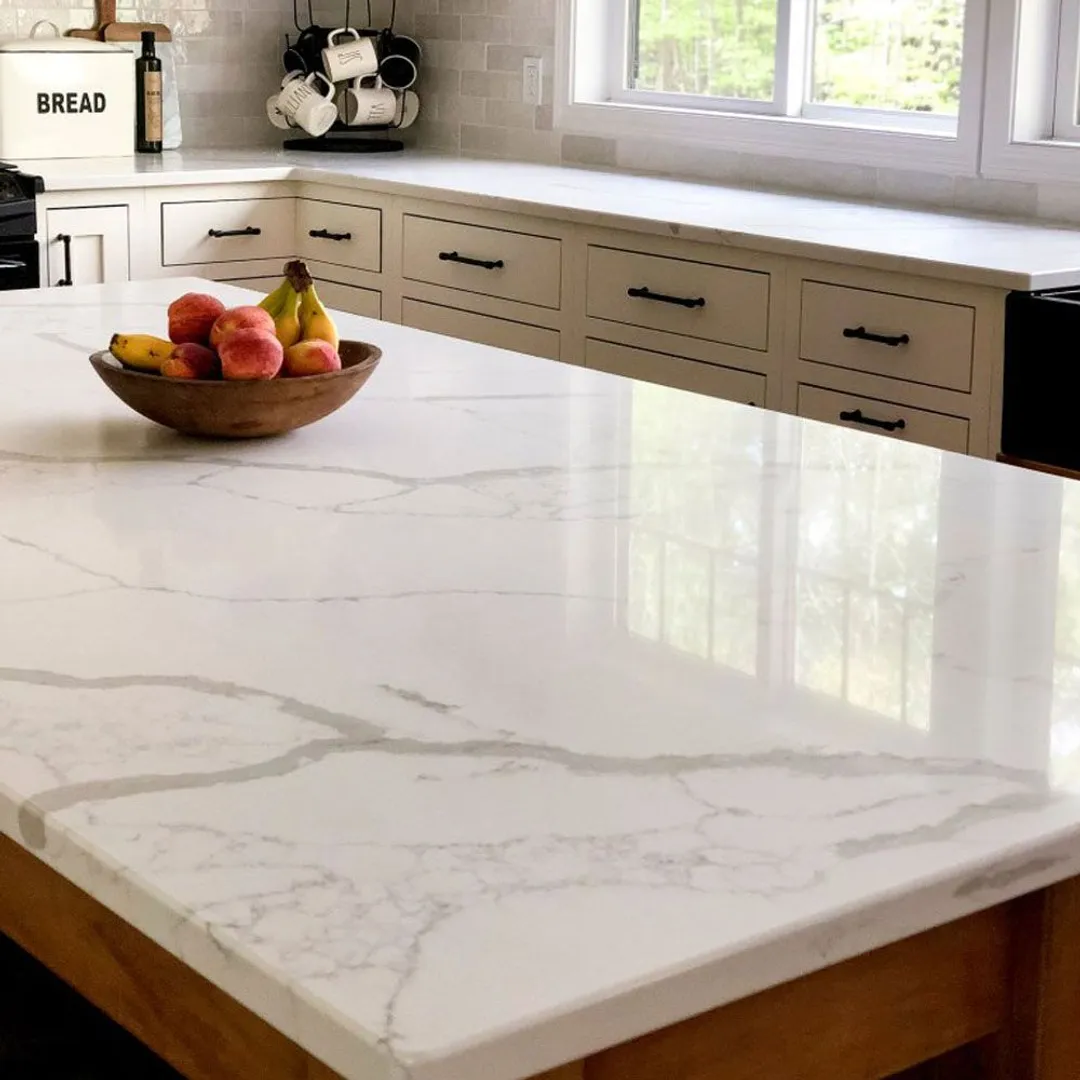
How to Clean Marble Countertops
Though pretty and durable, marble is very vulnerable to stains. This guide will show you how to clean marble countertops and keep them clean.
If you have a marble countertop in your kitchen, learning how to clean marble countertops properly is crucial. The knowledge won’t just save your countertop in the future, it will also save your bank account as well.
While a countertop cast out of natural stone is incredibly beautiful, it’s very susceptible to stains. And considering how expensive it is to repair ($200 to $1,000, on average), you will want to keep it spotless for as long as possible.
That’s where we can help. Here is how you can clean and maintain your marble countertops for maximum longevity!
Marble Countertop 101
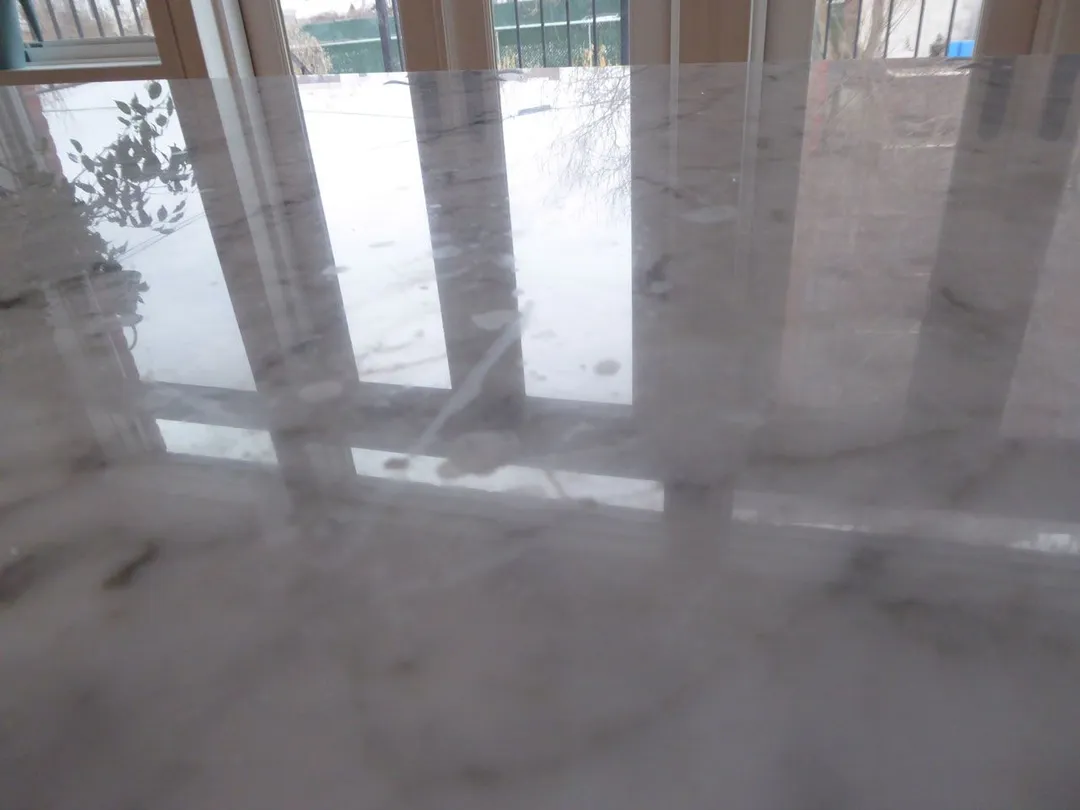
Beautiful and elegant, marble countertops are the prime choice for anyone wishing for a stately looking kitchen. No matter what type of stone — from the more affordable Carrara to high-end Calcutta — the patterns and coloration are all exquisite.
Aside from looking nice, marble is very durable, too; enough that marble has been extensively used in construction for thousands of years. It is strong, weather-resistant, and experiences very little degradation over time. That’s why marble furniture is legendary for its longevity, easily lasting a lifetime and then some – without exaggeration.
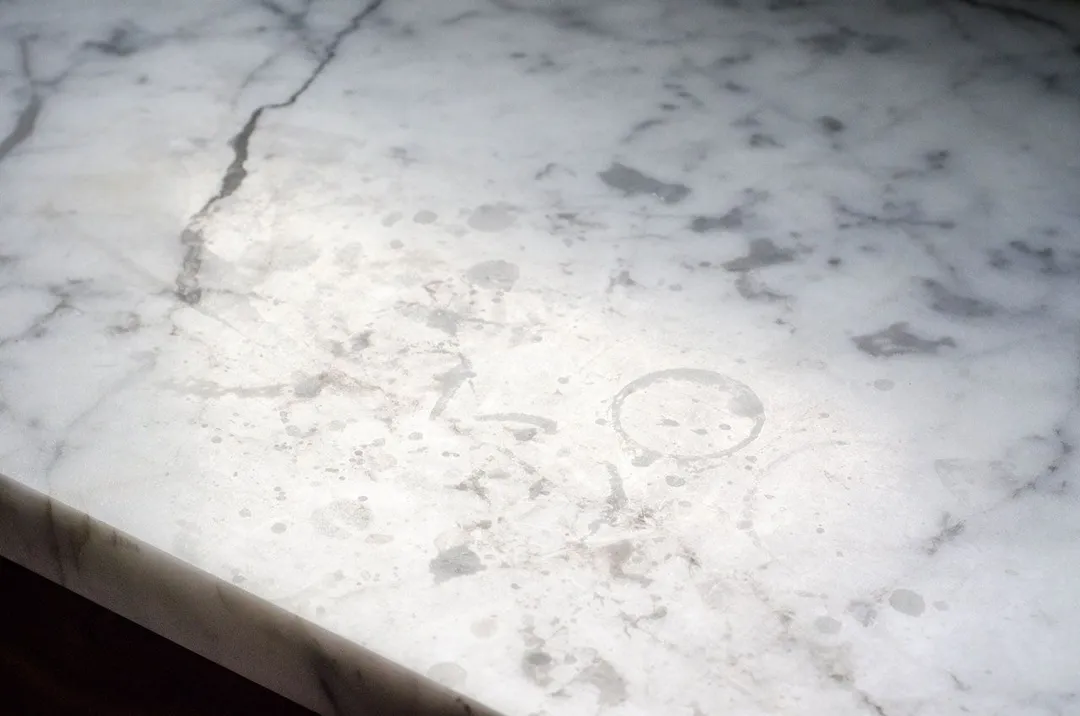
However, despite being a tough material, marble has one weakness: stains. The stone surface does not deal with stains very well and could be permanently discolored if you don’t take care of it well enough.
The reason boils down to simple chemistry. Marble is composed mostly of calcium carbonate. Calcium carbonate is very sensitive to acidic solutions.
A splash of something acidic (such as lemon juice or wine) onto the marble surface will instantly result in a reaction. The acid will eat away at the top layer, creating a hazy, dull-looking blemish on the surface known as etches.
Etches aren’t necessarily bad, depending on your aesthetic taste. A few people actually like these blemishes, likening them to “battle scars” that “build character” for the stone. Meanwhile, some others can’t stand them and will do anything to keep their marble countertops etch-free.
Anyhow, whether you like these etches or not, it’s still recommended that you keep your marble countertop as clean and free of imperfections as you can.
How to Clean Marble Countertops
For daily cleaning, marble isn’t very demanding. Just avoid using low-pH cleaning agents on the marble and you should be fine. These include low-pH detergents, lemon juice, or vinegar.
Here is the basic cleaning process, step-by-step.
Step 1: Pick the Kind of Cleaner You Want to Use
There are two kinds of marble cleaners that you can use: a specialized marble cleaner or a DIY-mixture. These agents will help you keep the marble’s surface shiny while helping to dislodge dirt and food residues.
For daily cleaning, we highly recommend using a specialized marble cleaner.
Though they may sound expensive, they really aren’t. You can get a decent bottle for around $10 that will last for around a couple of months. Since it’s formulated specifically for marble, these agents can be liberally used without causing any damage.
For emergencies (like when you run out of the marble cleaner), you can make a DIY cleaning mixture, instead. Mix a few droplets of pH-neutral soap with warm water in a spray bottle. The more common choice is gentle dish soap.
We do not recommend you use this as a fully-fledged daily cleaner.
Keep a bottle around and use it occasionally in emergencies only. If you use it too often, the soap will condense into a thin, murky film on top of the marble. Cleaning with a specially formulated marble cleaning agent will keep the marble looking good for longer.
Pick one of the two, then proceed to the next step.
Step 2: Spritz and Wipe
Coat the marble countertops generously with your cleaning agent of choice. Scrub with a damp towel or wet sponge until all of the suds are gone.

And voila, that’s really all there is to cleaning marble countertops!
How to Clean Up Stains on Marble Countertops
Stains are the worst thing that you will have to deal with as the owner of a marble countertop. Not only do they ruin the stone’s attractive look, but they’re also a nightmare to remove.
There’s really no “general cleaner” for marble stains. You will need to know or correctly guess the type of stain and apply the right cleaner.
How to Deal With Oil Stains
Oil stains, like those from cooking oil, milk, creams, or cosmetics will darken the stone if left untreated.
They’re also very difficult to treat because the oil can bury itself deep in the porous upper layer of the stone. Simply wiping the spot in question won’t be enough. Instead, you will have to draw the oil out of the stone.
You can do this with a mixture of a gentle liquid cleanser and ONE of the following chemicals, depending on what’s available:
- Ammonia
- Acetone
- Mineral spirits
- Bleach
Once again, pick one. Do not pick and mix two or more together. Mixing and matching may cause toxic gases to form. For example, ammonia and bleach will produce chlorine gas, which is extremely toxic.
Spray a small amount of the cleaner onto the oil stain. Let it sit for a few minutes.
After the cleaner has had the opportunity to soak up the oil, use a soft cloth to wipe the area. It may take a couple of goes for the stains to dissipate fully.
How to Deal With Organic Stains
Organic stains are coffee, tea, wine, and food residues. Depending on the type, these stains may have a brown or reddish-pink coloration. Fortunately, they are quite easy to remove.

There are two methods. One for light stains, and the other one for heavier ones.
With Baking Soda (Light Stains)
For light stains, mix three parts of baking soda with one part of water. This will form a cleaning paste.
Spread the paste over the offending area. Then, let the paste sit overnight.
Wipe off the baking soda the morning after and check the surface area beneath to see if the stain has been removed. If the stain is indeed light, it will have already been sucked out of the marble by the baking soda.
In the case that the stain is unfazed by the paste, you can try the second method.
With Hydrogen Peroxide and Ammonia (Heavy Stains Only)
Prepare a mixture of 3% hydrogen peroxide (1 cup) and a couple drops of ammonia.
Put a few drops of the mixture on a white blotter. Place the blotter over the stain. Weigh down the blotter with something heavier like a chopping board.
Every 10 minutes, check on the stain to see if it has been removed. If it hasn’t, reapply the solution.
Once it has, rinse the spot with hot water, then wipe dry with a soft cloth.
How to Deal With Biological Stains
Mold, mildew, or fungi are considered biological stains. These are quite common on marble surfaces near the sink or bathroom areas where there is a lot of moisture.
For removing biological stains, you can either use specialized mold removal solutions or common household bleach. Any of these will do the trick.
If you wish to go for the latter, mix three parts bleach with one part water in a spray bottle. Once the two have mixed, add a few droplets of dishwashing solution, as well.
Spray the moldy surface with your chosen cleaning solution, then wipe. Repeat until the stains have disappeared.
Rinse the surface thoroughly afterward to wash out the cleaning solution.
How to Deal With Water Stains
Water stains are extremely common. It happens when you leave water for too long on the marble and if your house uses hard water, stains may set in (especially around the sink area).
You can scrub out the stain using a dry, 0000-grade steel wool pad. Gently scrub the pad against the stain until it has been removed. Do not apply too much pressure or you’re going to scratch the stone.
If the stain is quite large or has been there for quite some time, the marble may demand a re-polishing.
Countertop water stains are preventable, however. Use coasters and trivets for all your drinks. As for the marble surface near the sink area, you should consider using a water softener to soften down the water.
How to Deal With Ink
If you’ve ever done your paperwork on the countertop and got a few smudges of ink on the marble surface, this section is for you. This method will work with most types of ink, ranging from pen ink to permanent markers and highlighters.
Ink is typically based on either water or alcohol. When the water or alcohol evaporates following drying, what’s left is an unsightly stain on your marble.
There are two methods at your disposal to fix this. It depends on how heavy the stain is, as well as the coloration of your marble countertop.
Light Ink Stain
If your countertop has a dark color tone, use a cotton swab and apply acetone to the tip. Swab over the area. The acetone should suck the ink right out.
For light colored marble, use 20% hydrogen peroxide, instead. Put a few droplets on top of the ink stains. Allow the hydrogen peroxide to sit for a few minutes until the ink begins to fade. Then, use a wet cloth or a sponge to wipe away the chemical along with the stain.
Heavy Ink Stain
For heavier ink stains, you will need to use a cleaning poultice. Mixing it is fairly simple.
In a bowl, add ¼ to ½ cup of flour, depending on how large the stain is.
Then, you can either add acetone (for dark colored stone) or 20% hydrogen peroxide (light colored stone) to the mix.
Add your chosen chemical to the flour one teaspoon at a time, mixing all the while. Stop adding when the mixture congeals into a dense paste.
Use a spatula or a spoon to spread the poultice across the stain. Apply generously. The poultice layer should completely cover the stain if it is to work.
Once it has been applied, cover the poultice with plastic wrap. Press down firmly, then secure the edges of the wrap with painter’s tape.
Use either a fork, a knife, or a toothpick to poke holes in the plastic wrap. This will quicken the rate at which the poultice dries.
Allow the poultice at least 24 hours to dry.
After 24 hours have elapsed, take off the plastic wrap. If the poultice is still slightly wet, allow it more time to dry out fully. Once fully dried, simply wipe it off the marble.
If the stain prevails, reapply the poultice. Repeat for as long as necessary.
When the stain has been adequately dealt with, put a little pH neutral soap onto a wet sponge. Then, gently scrub down the area where you previously applied the poultice.
How to Deal With Paint
Had a redecoration and accidentally got paint on your marble countertop? That can be fixed, too.
Similar to the ink removal process, there are two ways that you can do this. The one to choose will depend on how heavy the stain is.
Light Paint Stain
A light paint stain (a droplet or a trail of acrylic paint on the marble surface) can be dealt with using lacquer thinner. Carefully apply a little to the paint. Let it settle, then scrape it off with a razor blade. The paint should come off along with it.
Be very careful while you’re handling the razor blade. Scrape gently at the lacquer and do not be heavy-handed. The razor is fully capable of scratching and damaging the surface of the marble if it’s pressed against the surface.
Heavy Paint Stain
For heavier paint splatters that lacquer thinner is unable to deal with, we highly recommend that you enlist the aid of a professional. Paint is notoriously difficult to deal with. If you’re unsure about what you’re doing, proceeding further may do more harm to your paint-peppered marble countertop than good.
However, if you still wish to proceed, heavy paint stains can be eliminated using a commercial paint stripper. Be sure to follow the instructions from the manufacturer carefully during application.
Remove the paint stripper immediately once the paint has cleared. Hose down the countertop with clean water as well as give it a careful scrubbing.
While you’re applying the stripper, ventilate the area to avoid inhaling too much of the noxious gases. Wear protective equipment such as rubber gloves and protective eyewear while handling the stripper.
How to Deal With Metal or Rust Stains
A metal stain could appear if you were to leave an old, rusty metal implement on the marble for a long time. If the metal is iron, the rust can cause orange to brown discoloration. Copper or bronze implements will cause green or brown spots.
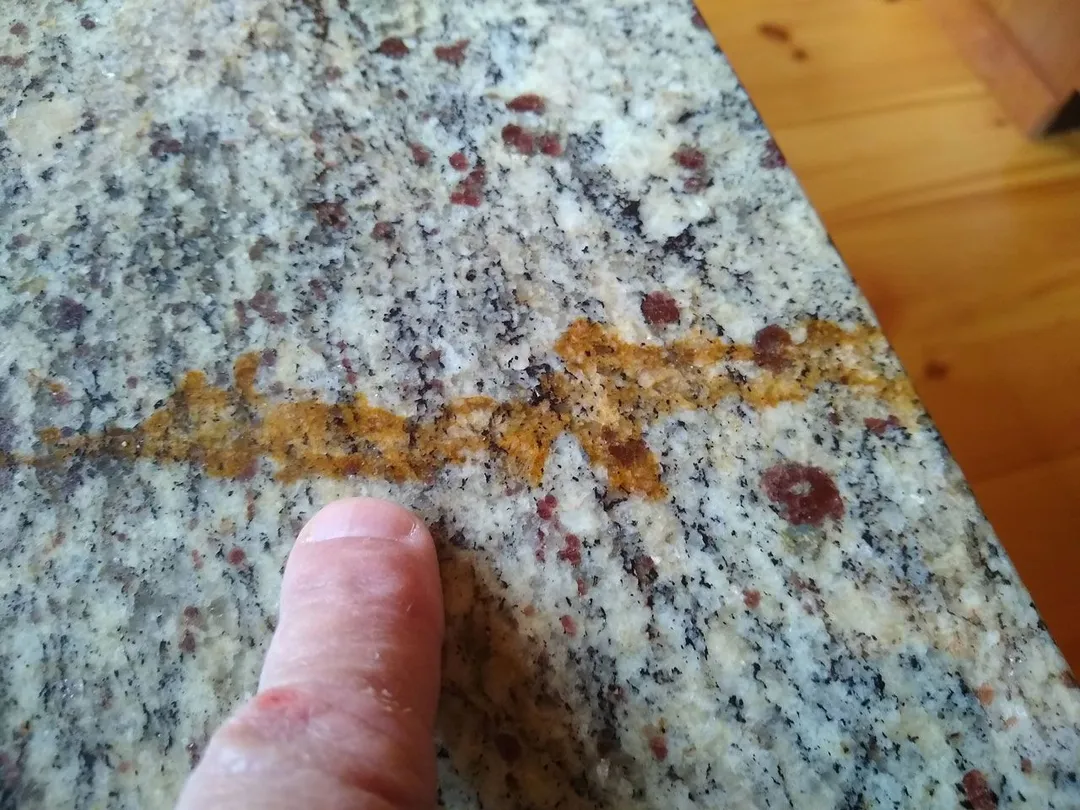
The stains are quite stubborn and will require you to use a rust stain-removing poultice. Make sure that the brand you choose is compatible with marble.
Step 1: Mix the Poultice
Mix the poultice with water. Follow the instructions on the box. Typically, the poultice should be mixed up until it attains the same consistency as peanut butter.
Step 2: Slather on the Marble
With a spatula or a large spoon, slather the poultice onto the stain. Apply generously. The poultice should completely cover up the stain. It should also be around ¼ or ½ inch thick.
Step 3: Wrap Up in Plastic Wrap
Cover the poultice with plastic wrap. Weigh down the wrap, then secure the sides with painter’s tape.
Step 4: Wait
Give the poultice a minimum of 24 hours to properly set and dry. A few brands will advise you on the box to give the poultice 48 hours to dry. In such cases, do so.
Step 5: Remove the Plastic Wrap
Once the poultice has dried out, remove the plastic wrap. The action will allow the poultice to pull the metal stains out of the marble.
Sometimes, the poultice will still be slightly wet. Allow it to dry the rest of the way, then take off with a scraper.
Step 6: Cleaning Up
Clean the marble countertop with clean water and a soft cloth. Make sure that every trace of the poultice is gone from the countertop by the time you’re finished.
How to Remove Etch Marks on Marble
No matter how well you take care of your marble countertops, they will eventually develop etch marks. If you don’t like the way they look, you can opt to remove them via repolishing.
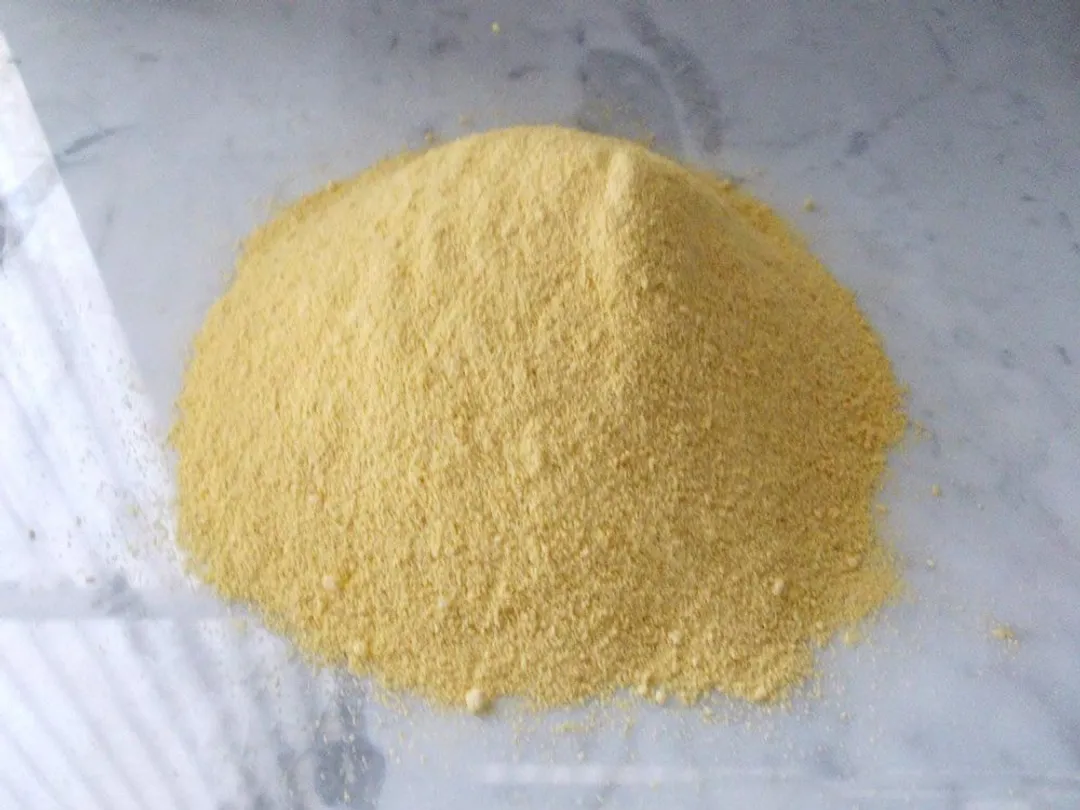
What Is Marble Polishing Powder? How Does It Work?
An essential component of the repolishing process is marble polishing powder.
As we mentioned earlier, marble is primarily made from calcium carbonate, which is highly sensitive to acid. An acidic solution can eat away at the top layer of the marble, forming dull-looking spots that are now known as etches.
The dull spot is the layer of marble beneath the part that’s already been dissolved by the acid. Unlike the top layer, it is not polished and therefore, doesn’t look as glossy or pretty.
You can fix this with a marble polishing powder. The powder is highly abrasive and can act like a sort of powderized sandpaper. Apply it to the dull spot, scrub, and the coarse powder will polish the etch to a glossy sheen.
Marble polishing powder can be bought for $30 to $50. Before you buy any, however, make sure that the powder is suitable for your marble’s coloration. Some powders are made for light-colored marble while others are better for dark-colored ones.
How to Polish a Marble Surface to Remove Etch Marks
Step 1: Clean the Surface
First, wipe down the marble surface with a cloth or sponge to remove any lingering dirt and debris. If the spot is near your hob, there could be grease stains. Residues from soap or cleaners may also be present. In such cases, clean the offending stains using the aforementioned methods.
You don’t have to do the whole countertop. Just ensure that the spot with the etch is dirt-free.
Step 2: Spread the Powder Above the Etch Mark
Sprinkle a hearty amount of the marble polishing powder on top of the etch mark. It should cover the mark completely.
Step 3: Spray Water Onto the Powder
Use a spray bottle and spritz the powder three or four times until it’s damp.
Step 4: Scrub the Powder
Take a dry towel and spray it with some water to make it damp. Ensure that you use a white towel, you don’t want the pigment from the towel to leak into the marble as you scrub.
Scrub the powder in a circular motion over the etch mark until it disappears.
Do not apply too much pressure or you’re going to scratch the marble. Instead, focus on speed: rub as quickly as possible. If after a minute of scrubbing the etch hasn’t been removed, slightly increase pressure.
Stop rubbing the moment the spot fades away.
Step 5: Clean Up
Hose down the marble countertop to remove all traces of the polishing powder.
How to Seal Marble Countertops
If you have a marble-anything, sealing is incredibly important. Like we mentioned earlier, marble is quite porous, which is why it’s susceptible to stains. Sealing creates a clear protective layer above the raw marble that will ward off spillages and prevent stains. It can save you tons of time and effort cleaning.
We highly recommend that you reseal the marble surfaces in your home once every 3 to 6 months.
Fortunately, resealing is quite simple. With the proper equipment (all of which are affordable), you can do it yourself at home.
Impregnator/Penetrating Sealer vs. Surface Sealer
There are two types of sealers on the market: impregnator (penetrating) sealer or surface sealer.
An impregnator sealer can burrow (or penetrate) itself into the porous stone and fill up the tiny cavities. This effectively prevents water, oil, or any other type of stain from infiltrating the stone. When an impregnator sealer is applied correctly, you won’t be able to notice it at all. There’s no change in the coloration or the texture of the stone.
We highly recommend using this type for marble.
On the other hand, a surface sealer sticks only to the surface layer of the stone. While it does protect the surface from forming etches or scratches, it gives the stone a noticeable sheen. Surface sealer also changes the texture of the stone.
Because of this characteristic, this type of sealer is often not recommended for marble.
As a result, in the following section, we will show you how to apply an impregnator sealer only.
How to Apply Sealer to a Marble Countertop
What You Will Need
- Clean towels
- Gentle dish soap
- Razor blade
- Plastic scraper
- Chamois
- Acetone
- An impregnator sealer
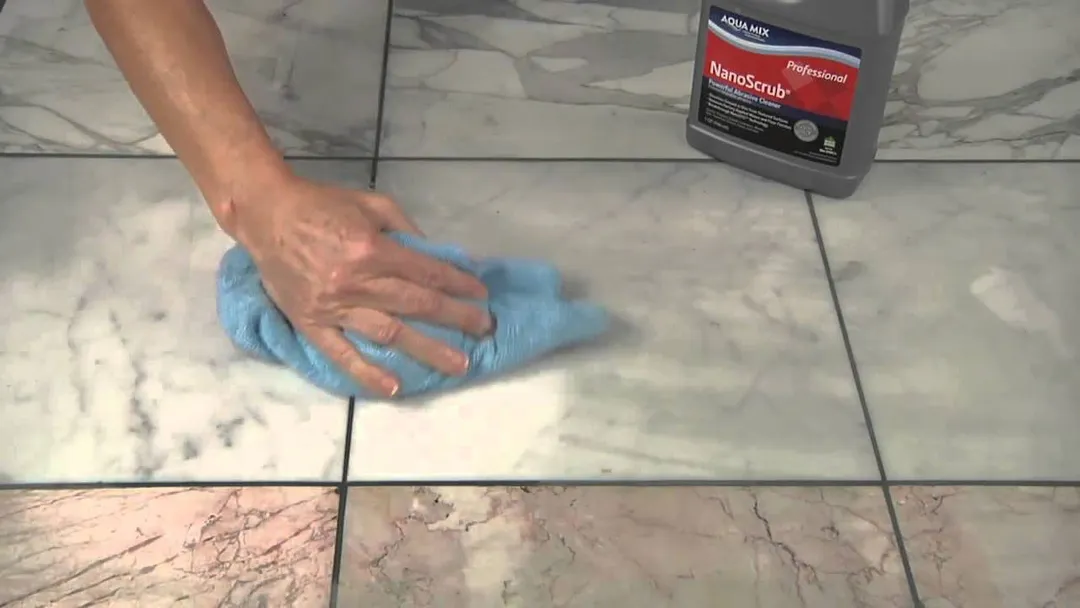
Step 1: Clean the Marble Surface
Use a clean towel to wipe superficial dust and dirt from the surface. If there are stains or food debris and residue on the surface, eliminate them using the methods we mentioned earlier.
Then, spray a little gentle dish soap onto the marble and scrub it clean.
Soak up any moisture on the marble with a dry cloth before continuing.
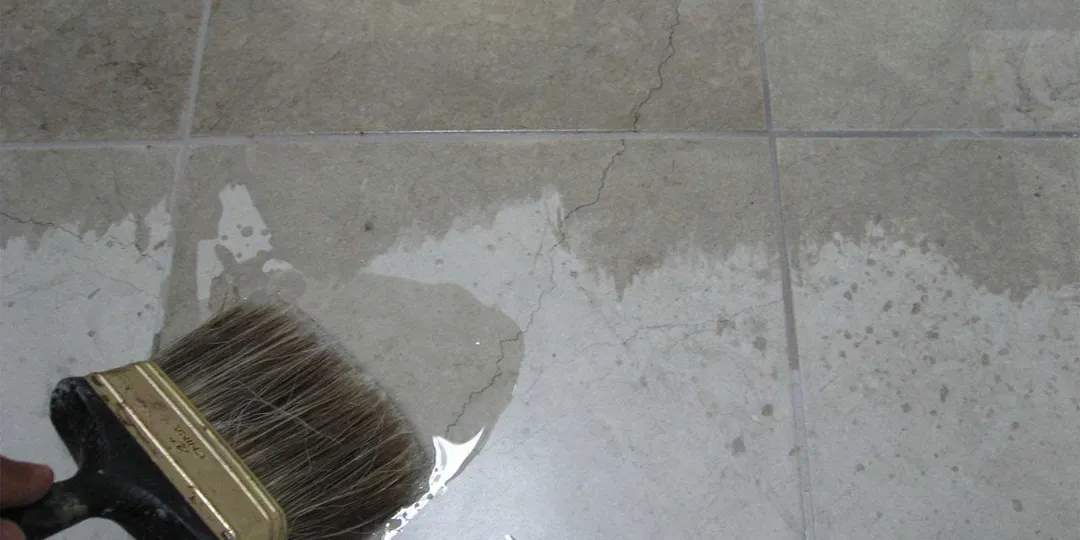
Step 2: Remove the Old Sealer
Most marble countertops these days will be sealed right in the factory. In that case, strip the old sealer using acetone. Cleaning with acetone will also remove any soapy residues left behind from other cleaners and soap.
Once the acetone has been applied, rinse the surface with a damp cloth. Immediately soak up the moisture using another dry cloth. Do not let the marble air dry.
Step 3: Read the Instructions and Apply the Sealer
The sealer you bought will have instructions written on the packaging. Read it and follow every step. However, nine times out of ten, the process is the same.
First, apply the sealer to the marble, then spread it evenly across the surface with a spatula or a spoon. Once that’s done, leave the sealer to soak into the stone (typically only about 5 minutes).
Rinse the surface to clear it of excess sealer, then dry with a cloth.
Step 4: Second Coat Is Optional
Depending on the brand, they may tell you to apply a second coat. If so, follow the instructions and repeat the sealing process. In most cases, however, a single coating will do the trick.
What Is a Marble Color Enhancer?
If you purchased the marble primarily for its beautiful look and would like to maintain it, apply a marble color enhancer every once in a while.
Old, well-used marble has a tendency to look faded. A color enhancer can return the marble to its original coloration and beauty. Depending on the type of enhancer, you can also add different levels of glossiness to the stone.
A marble color enhancer does not have any protective effect like a sealer. Do not mistake it for a sealer.
Treating a marble countertop with an enhancer could be regarded as an ”optional extra” but, with a color enhancer being so affordable and easy to apply, it is well worth it for most users.
You should apply a color enhancer every time you re-seal the marble. After applying the sealer, add the enhancer right on top. The process of applying the enhancer shouldn’t be any different to that of the sealer.
Conclusion
Now that you have learned how to clean marble countertops properly, it’s only a matter of putting it into practice. Although it is quite tricky to maintain, the premium feel and look of marble are well worth the effort. There aren’t many other materials around that can enhance your kitchen space like this beautiful stone.
If you have any questions, leave a comment below!
Authors

Luna Regina is an accomplished writer and author who dedicates her career to empowering home cooks and making cooking effortless for everyone. She is the founder of HealthyKitchen101.com and HealthyRecipes101.com, where she works with her team to develop easy, nutritious recipes and help aspiring cooks choose the right kitchen appliances.